Trello for business: A complete guide to managing your workflows
From the free tier to the enterprise version, ITPro talks you through your Trello workflow, from start to finish
READ MORE
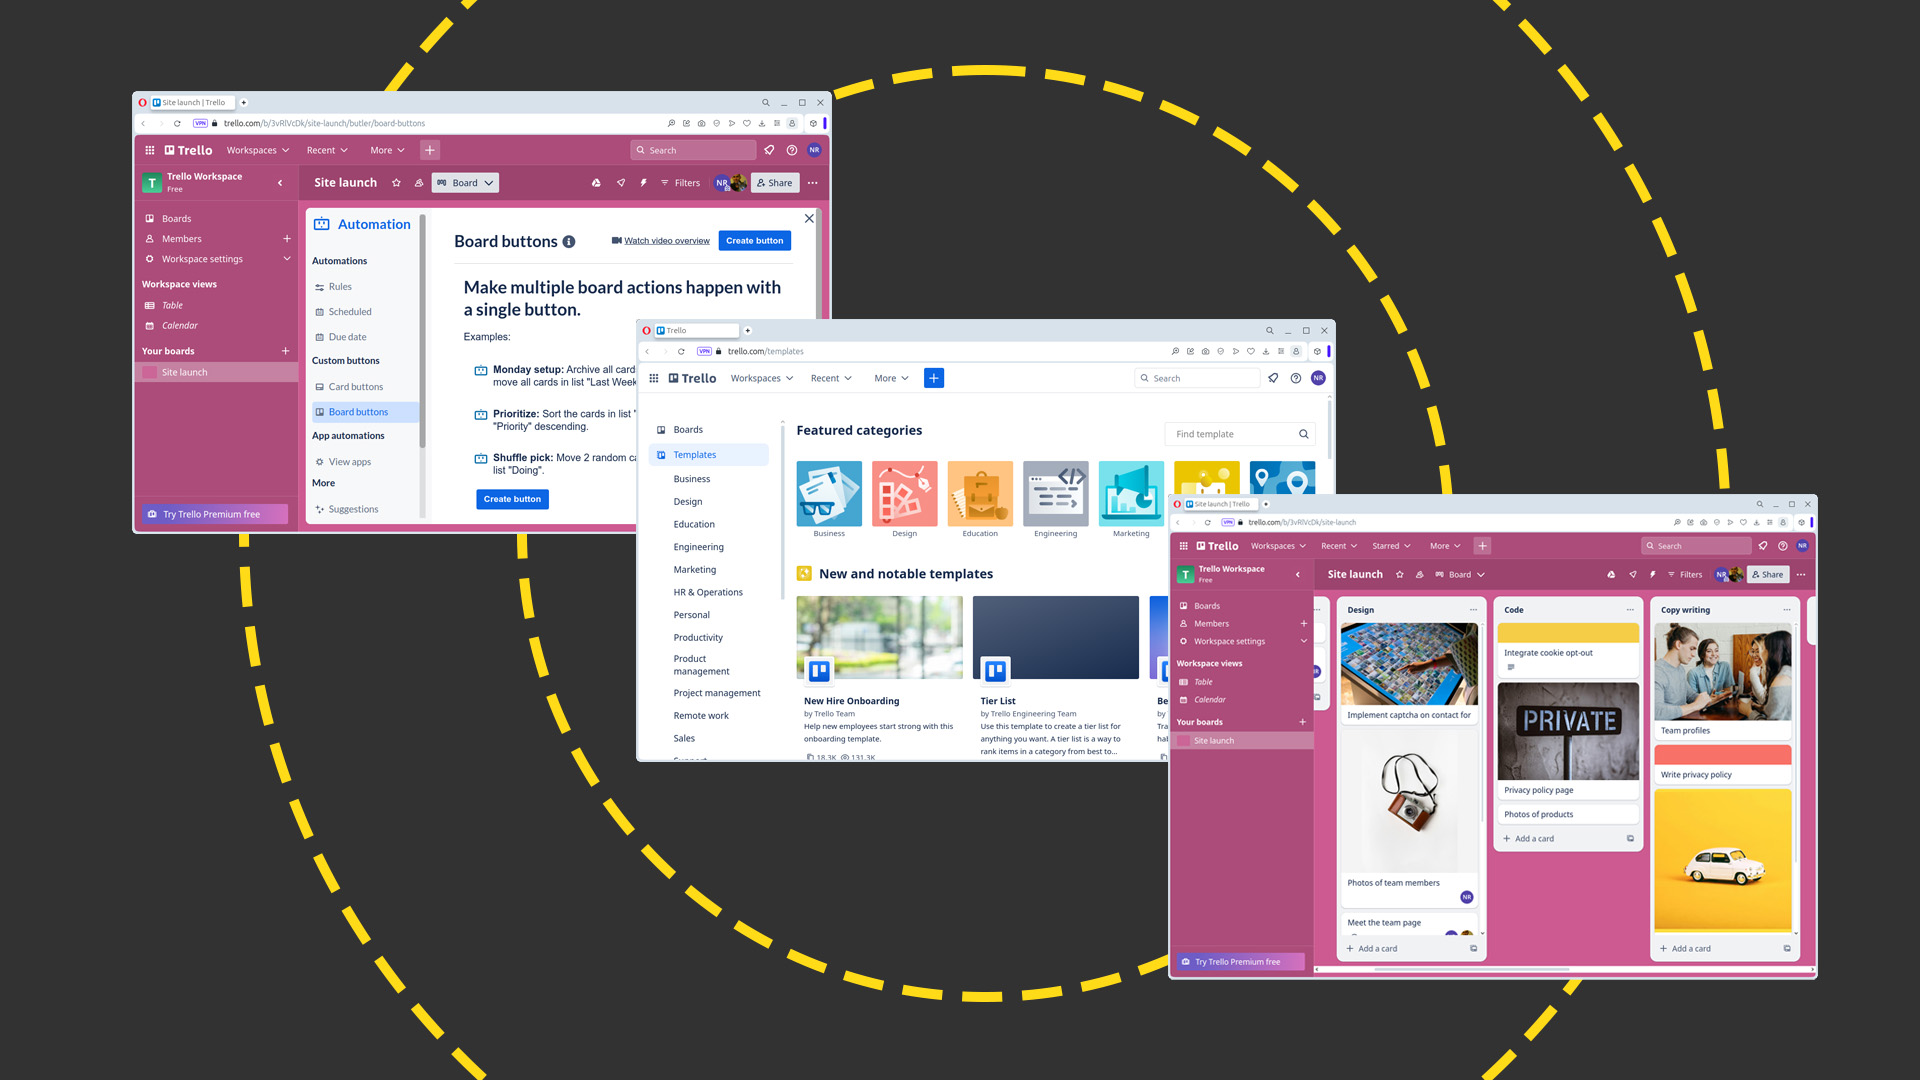
Trello is a project management tool. Whether that project is the launch of a brand new product by a team of 500, or the tasks you need to tick off every week in your solo business, it makes short work of planning and organizing jobs and monitoring progress.
It's based on the Japanese principle of kanban, in which jobs are assigned to cards, which are organized into lists on an overall project board. Although it has its roots in factory management, it can be applied equally to knowledge work and the service industries.
Here, we'll show you how to set up your first board and use it to manage an evolving workflow, from project launch to completion.
Sign up for Trello for business
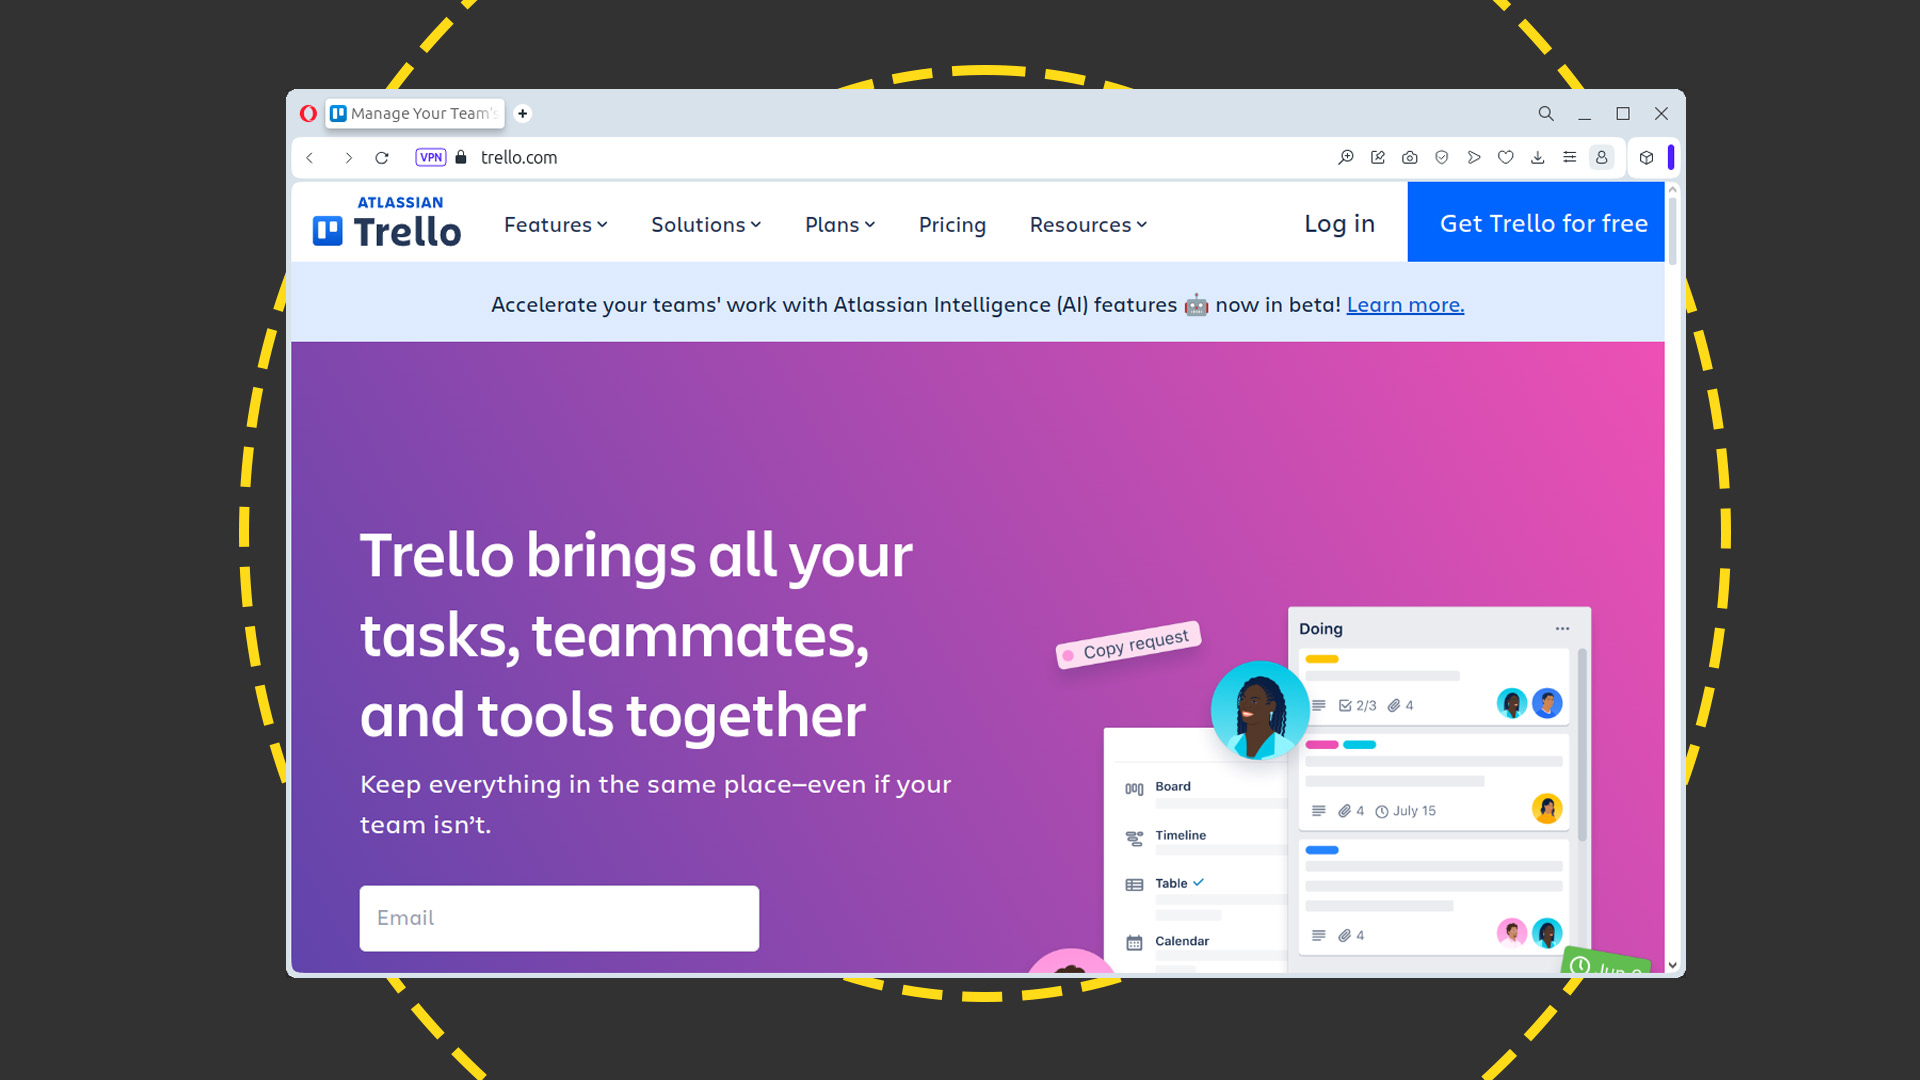
Visit www.trello.com and click 'Get Trello for free'. Even if you plan to use one of the charged-for tiers in the long run, everything starts with a free account. Enter your email address, then check through the terms of service and privacy policy. If you're happy to abide by them, click 'Sign up' to complete the process. Trello will send an email to the address you specified, so check your inbox and click the 'Verify your email' button inside the email. Type in your full name and your preferred password, then click 'Continue'.
Trello for business: Create your first board
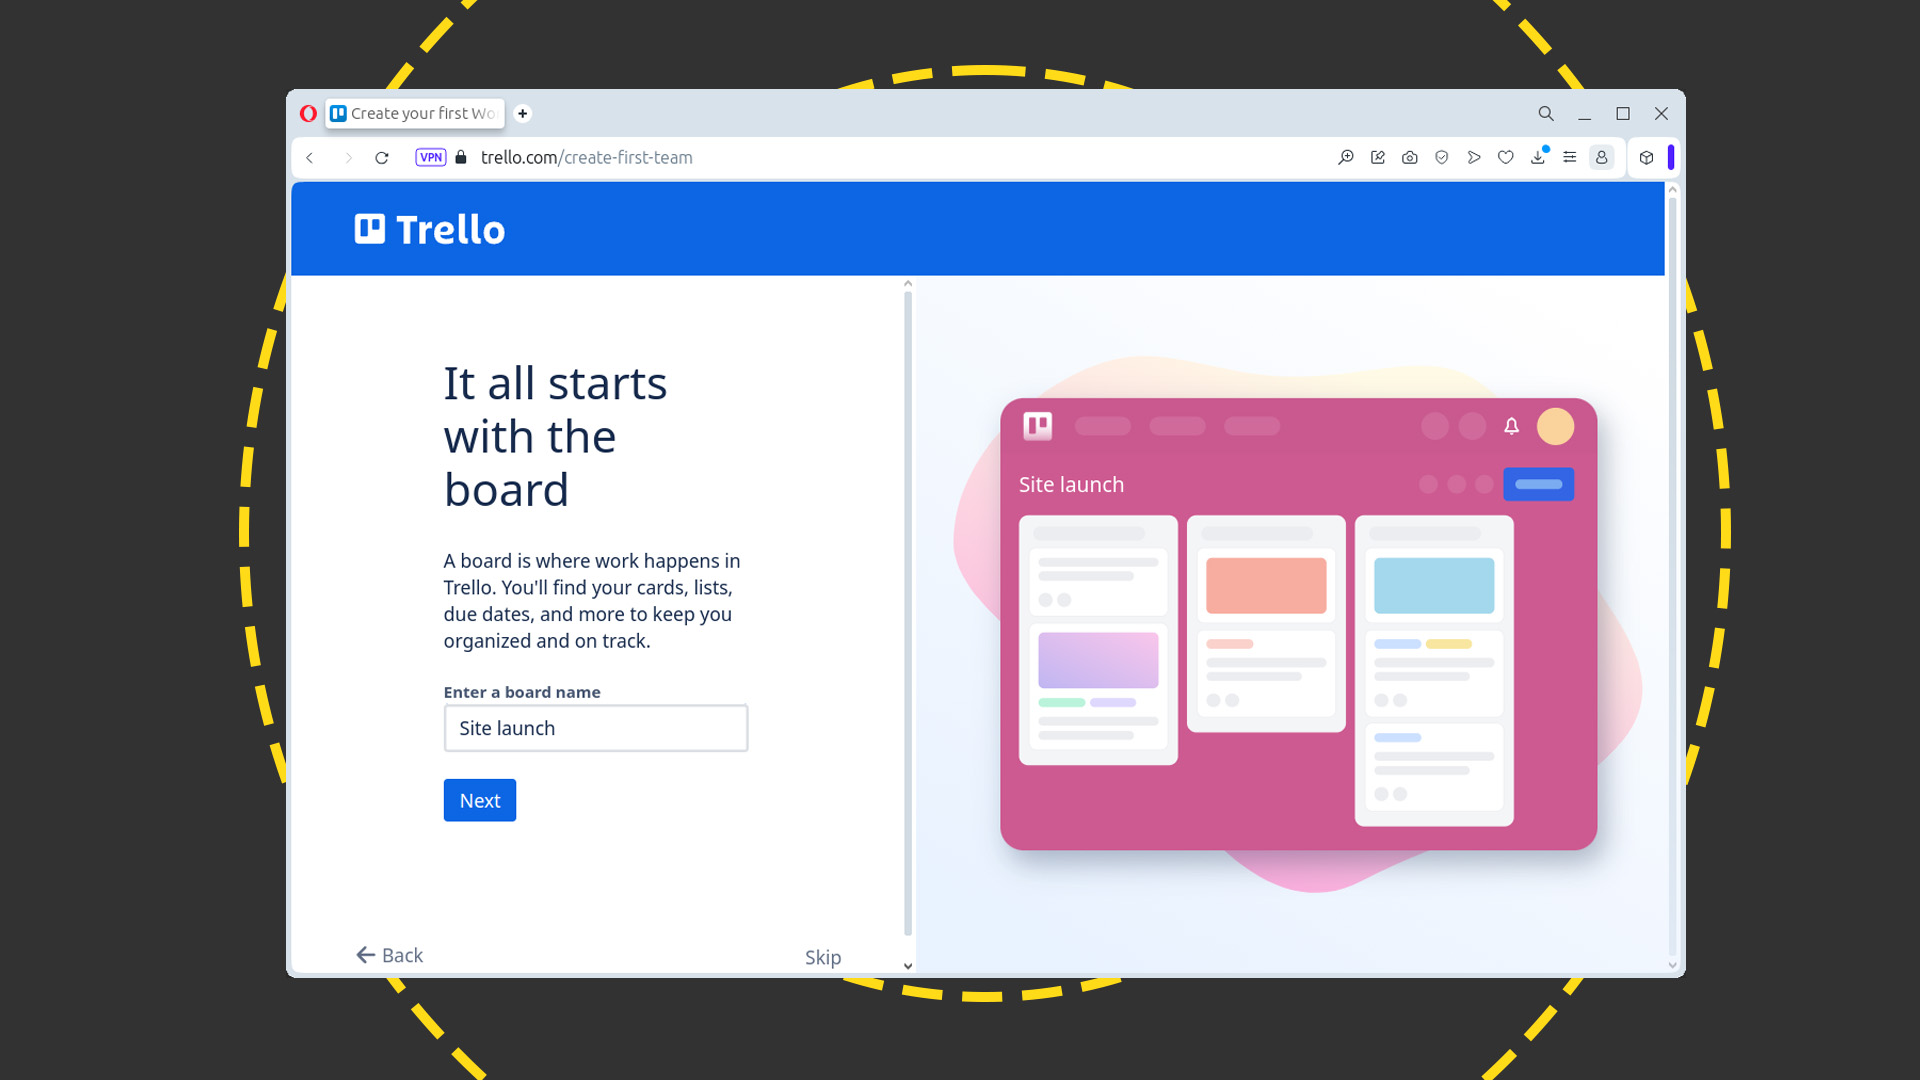
Trello uses boards and cards to organize your work. Each card will contain a single task, and your cards as a whole will be organized into lists on the board. These lists can be anything you want, but common examples include departments if responsibility for each job progresses through a logical chain, or status – like 'to do', 'in progress', and 'done' – for work that's completed within a single team or department.
We're going to create a board to manage the launch of a new website, which will be worked on by several individual teams. Click Next, and give your board a name. This can be anything you want but, as you can create up to 10 boards with Trello's free plan, it's worth picking something logical so your colleagues can quickly locate the right one.
Click Next, then type the names of your first three lists. Trello suggests 'To do', 'Doing', and 'Done', but in our case, it makes more sense to take a more granular approach. We'll therefore create lists based on the different areas of responsibility within our team. As you can see from the screenshot, we've opted for Capture, Design, and Code. We'll add further columns when we get to interact with the board directly, but, for the moment, these will be used as a receptacle for capturing ideas, a list of cards for the design team, and a second list for the coders.
Sign up today and you will receive a free copy of our Future Focus 2025 report - the leading guidance on AI, cybersecurity and other IT challenges as per 700+ senior executives
When you've specified your first three columns, click Next to move on. Trello now wants you to create your first two cards, which will automatically be assigned to the Capture list. Ideally, we'd be using the capture list as an ad-hoc dumping ground – a bit like a jotter – either when ideating as a team, or when individual team members have ideas for the project. So, for the moment, we'll add two essentials for our site: 'Implement captcha on contact form', and 'Integrate cookie opt-out'.
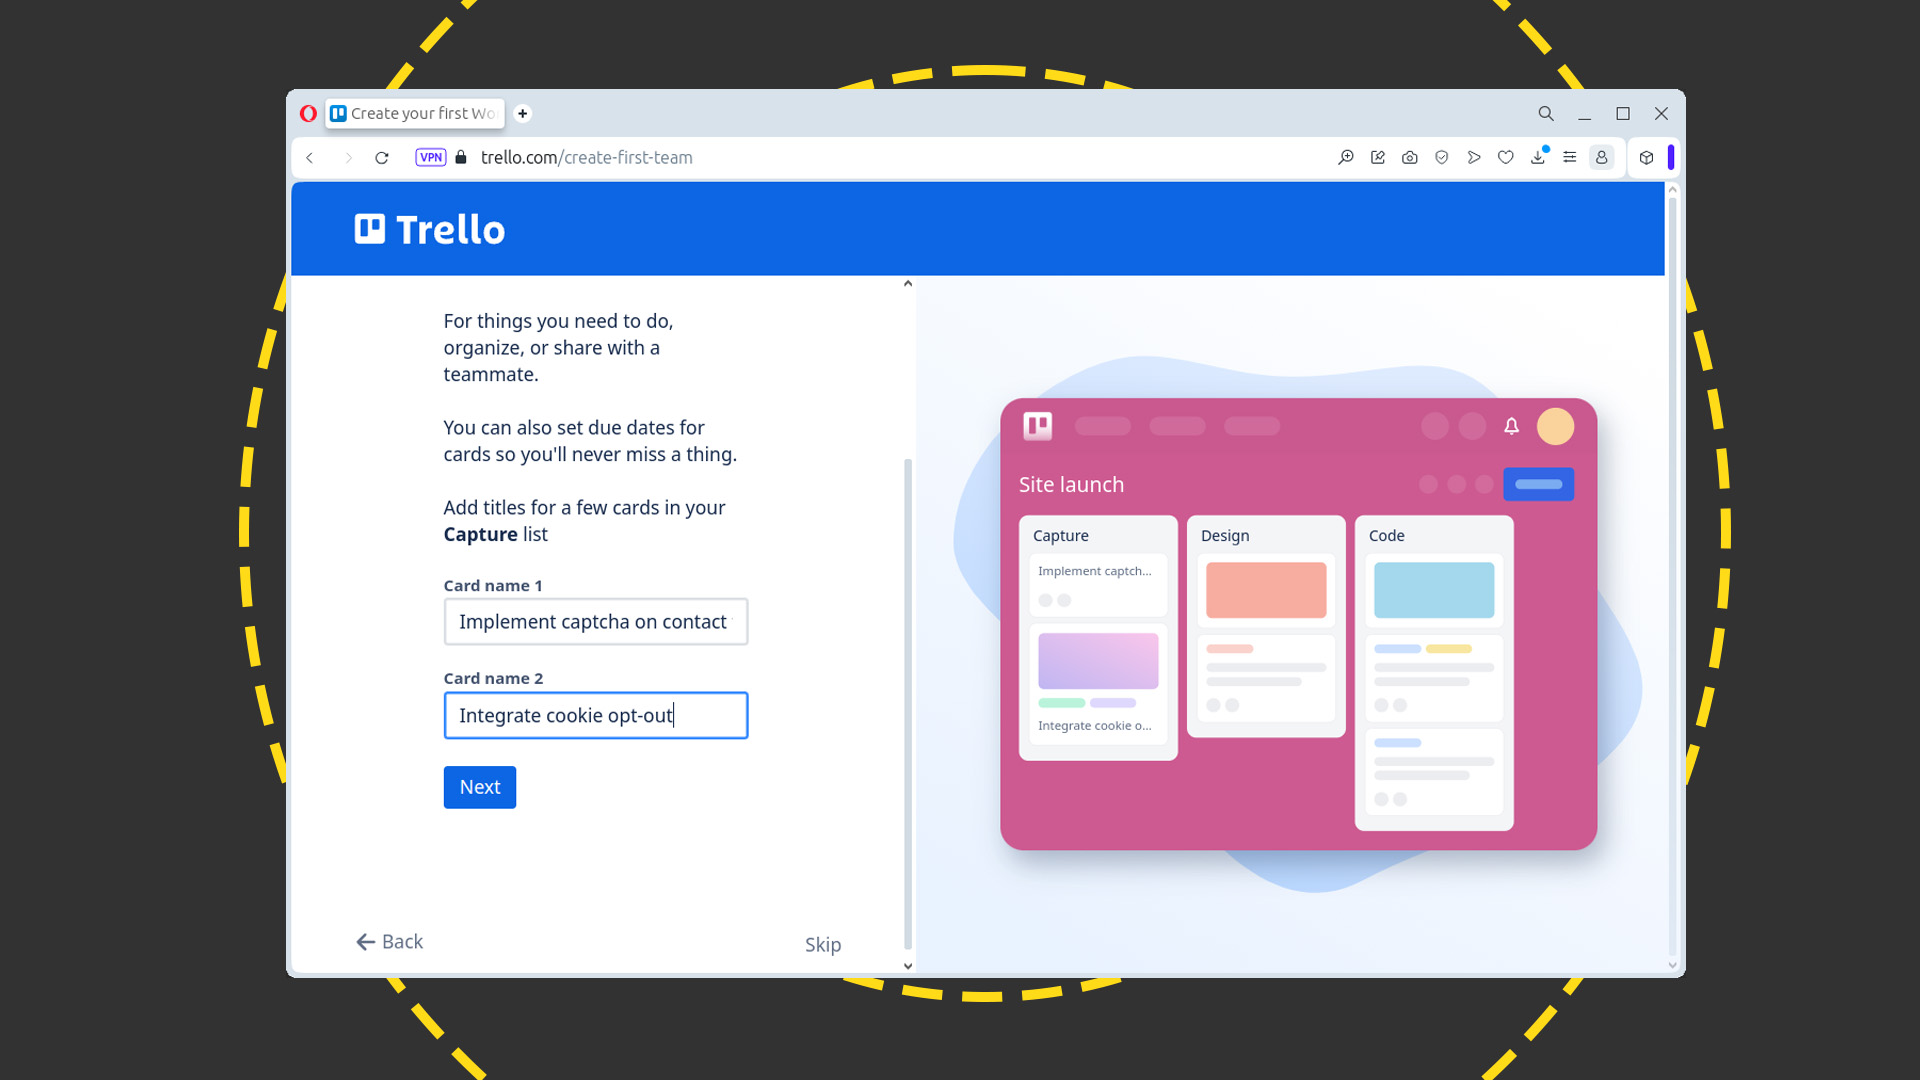
When you've created your first two cards, click 'Next'. If you'd like to invite another team member to collaborate on your board, type their email address in the box on the following screen, then click 'One last thing' to send them an invitation.
You've just finished signing up and creating your first board. At this point, Trello will offer a 30-day free trial of the Premium plan. Scroll down and click either 'Start your Premium 30-day free trial', or Skip, as appropriate. In this walkthrough, we'll be using the features of the free plan, so will click Skip at this point.
Trello for business: Start assigning tasks
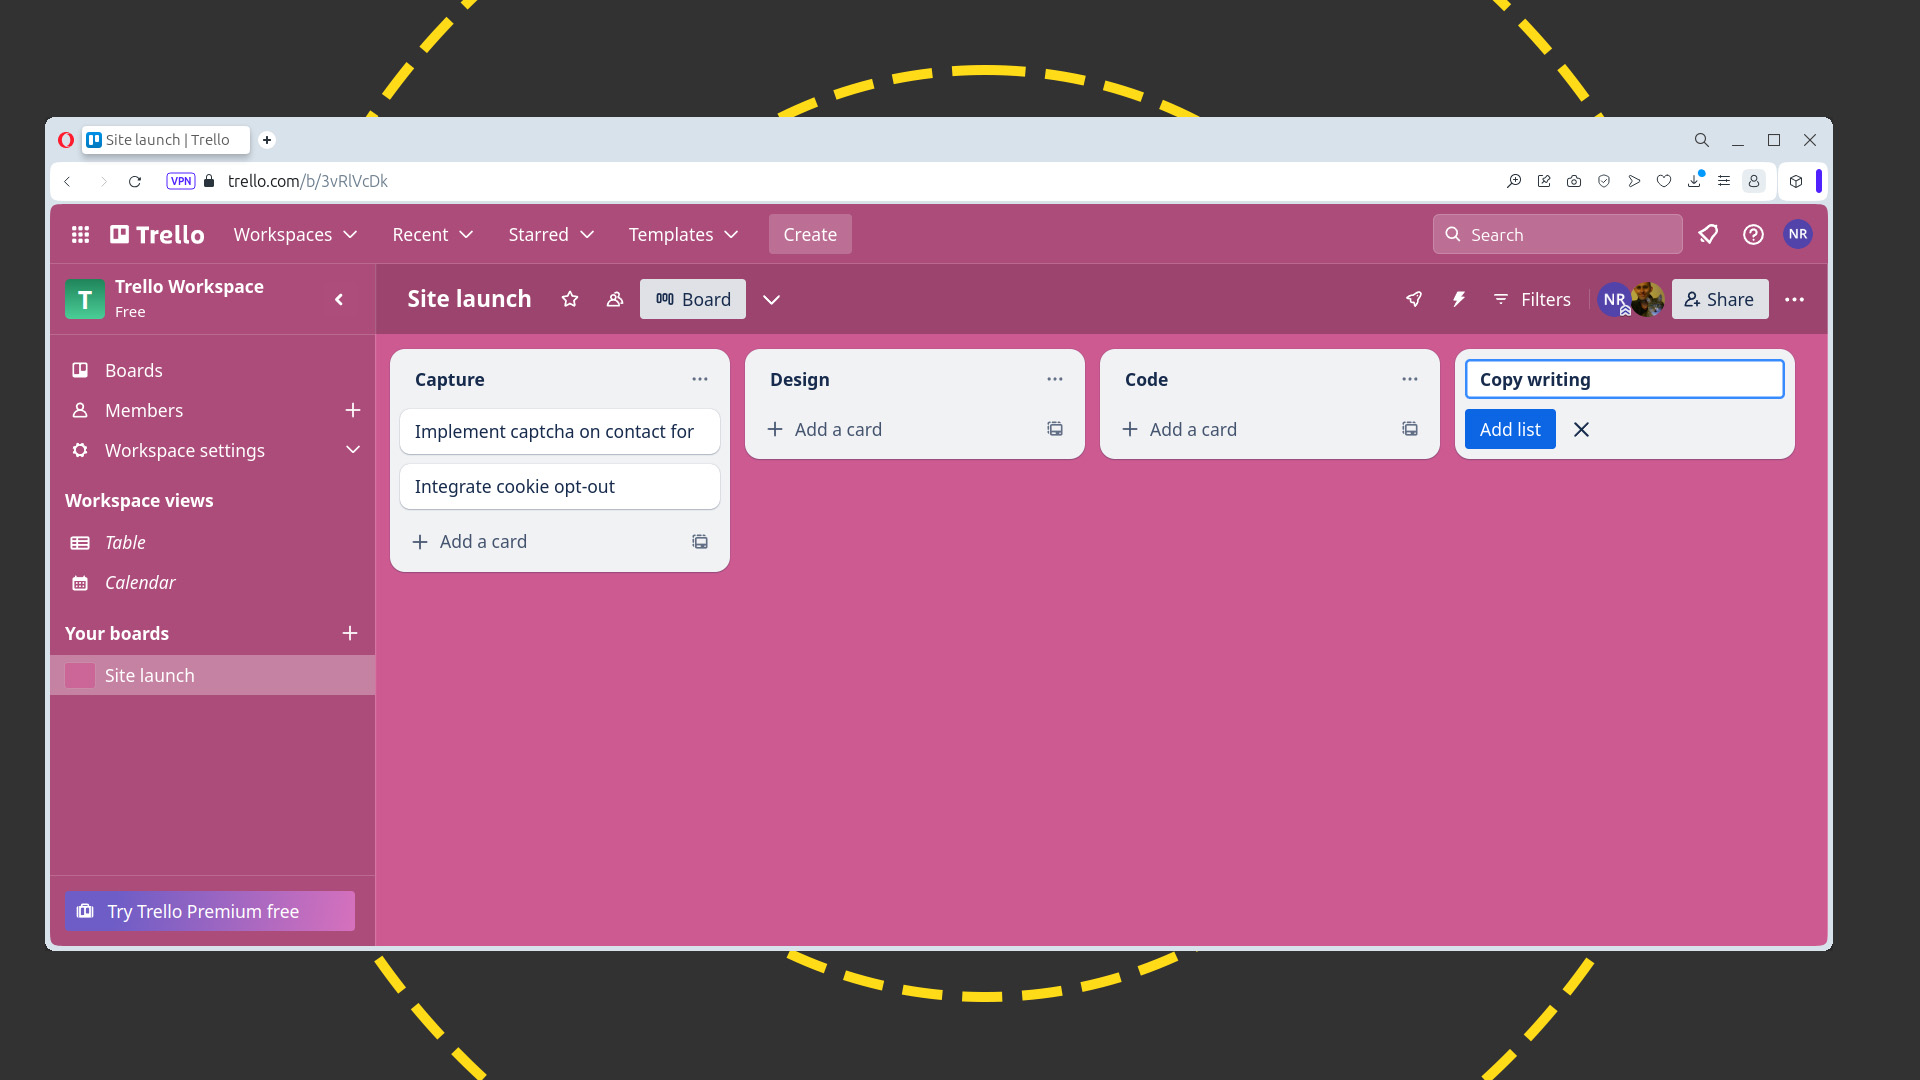
You'll now have arrived at your board, containing three lists – Capture, Design, and Code – and the two cards you created as part of the set-up process. Your next job is to finish creating the lists that you'll use to organize your team's workflow. Click 'Add another list' to the right of the Code list, and create a list for 'Copywriting', then further lists for 'Design second pass', 'User testing', and 'Publishing'. Finally, create a list for 'Done', which is where you'll drop cards once they're no longer needed.
Let's start fleshing out some of the jobs. Scroll back to the first list – Capture – and click the 'Integrate cookie opt-out' card to open its editing screen. Click in the Description box and explain exactly what needs doing. If you have a more extensive briefing document, you can attach it directly by clicking the 'Attachment' button in the sidebar. Although your team can add an unlimited number of files to the board, they must each be 10MB or smaller on the free tier. If you need to work with larger assets, either compress or break them down into smaller parts, or use the link option (on the formatting toolbar above the Description box) to link to it. You could also use a power-up, which we will explore later, to link directly to a file or folder on a cloud account.
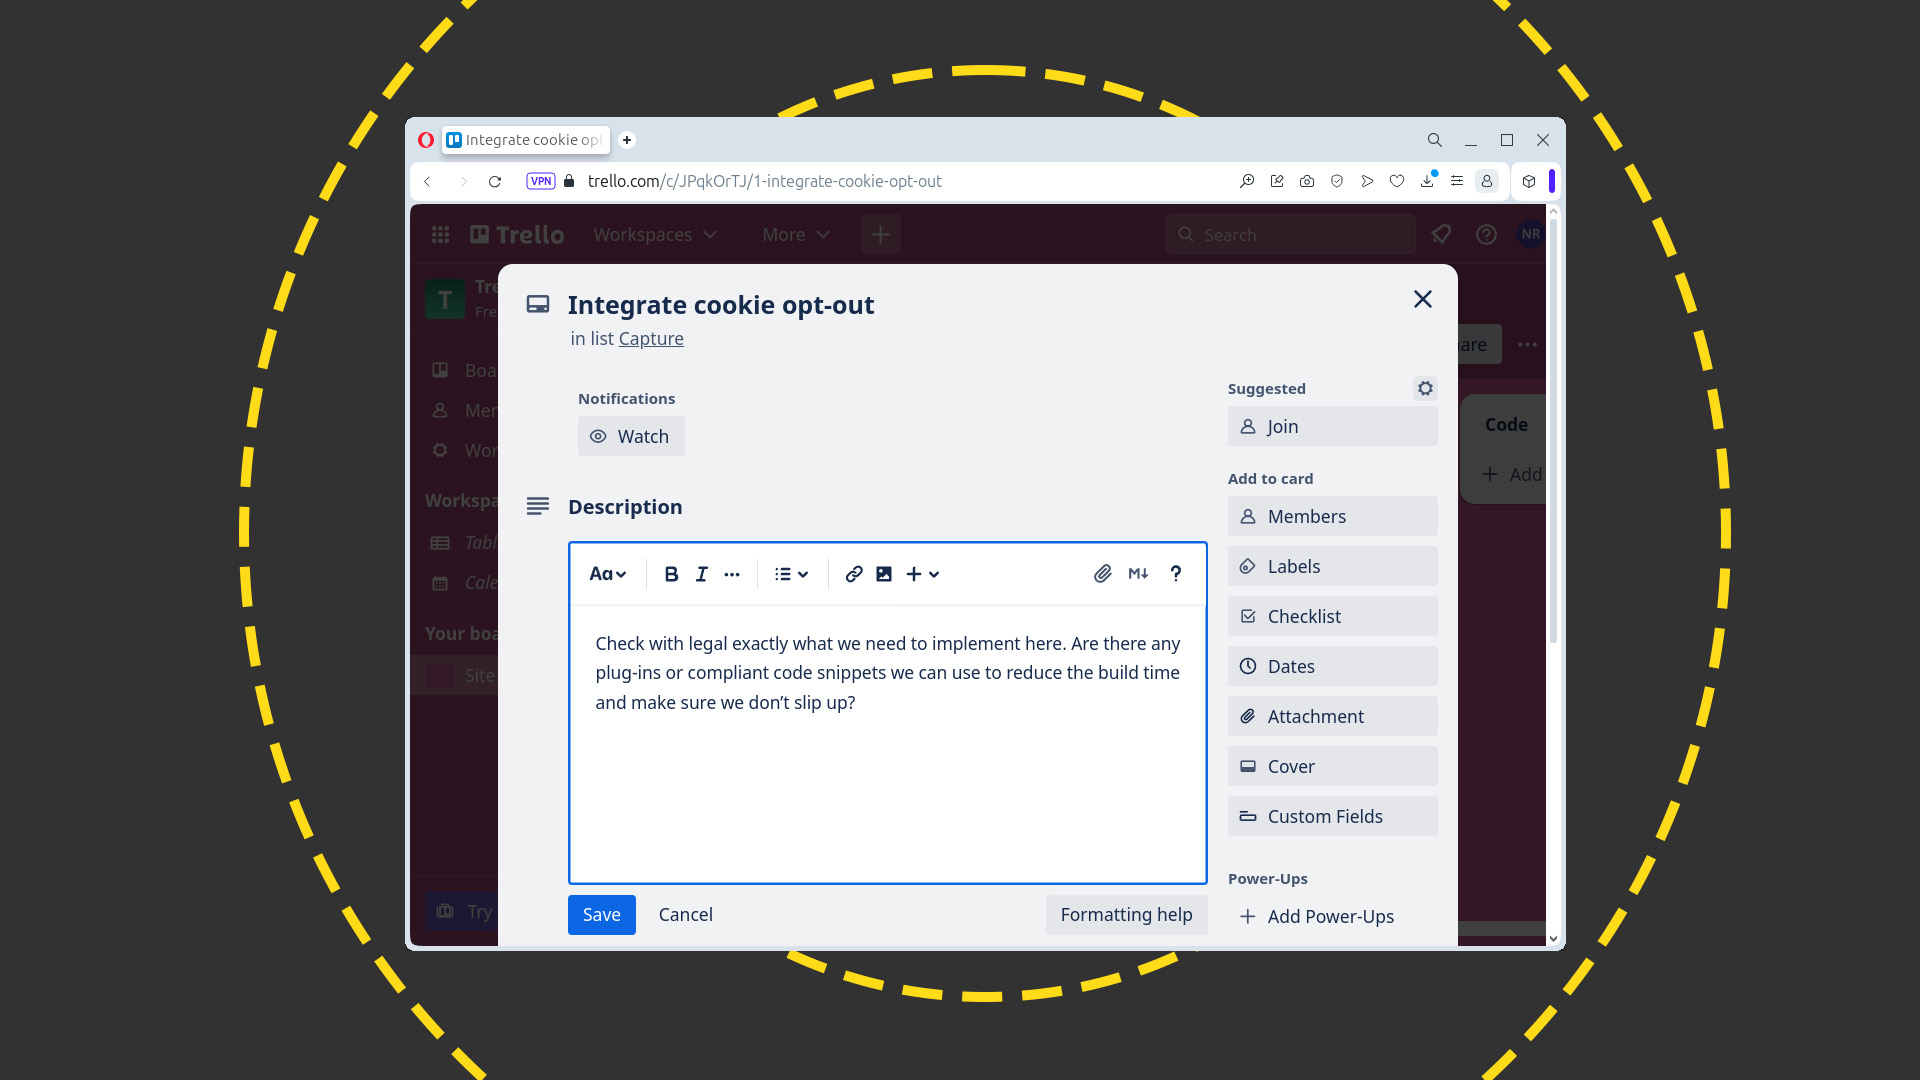
The card is immediately more useful with the Description filled in, but don't stop there if attaching metadata would give it more context. For example, if you've invited other members of your team to join the board and you want to assign the job specifically, rather than to a department, click Members, followed by the name of the team member who needs to complete the task.
If a job is due by a certain data, click Dates, and select a deadline on the calendar. And, if you want this card to stand out on the board, click Cover and select a color or image. (Tip: use the 'Search for photos' button at the bottom of the dialog to integrate an appropriate photo from Unsplash.com.)
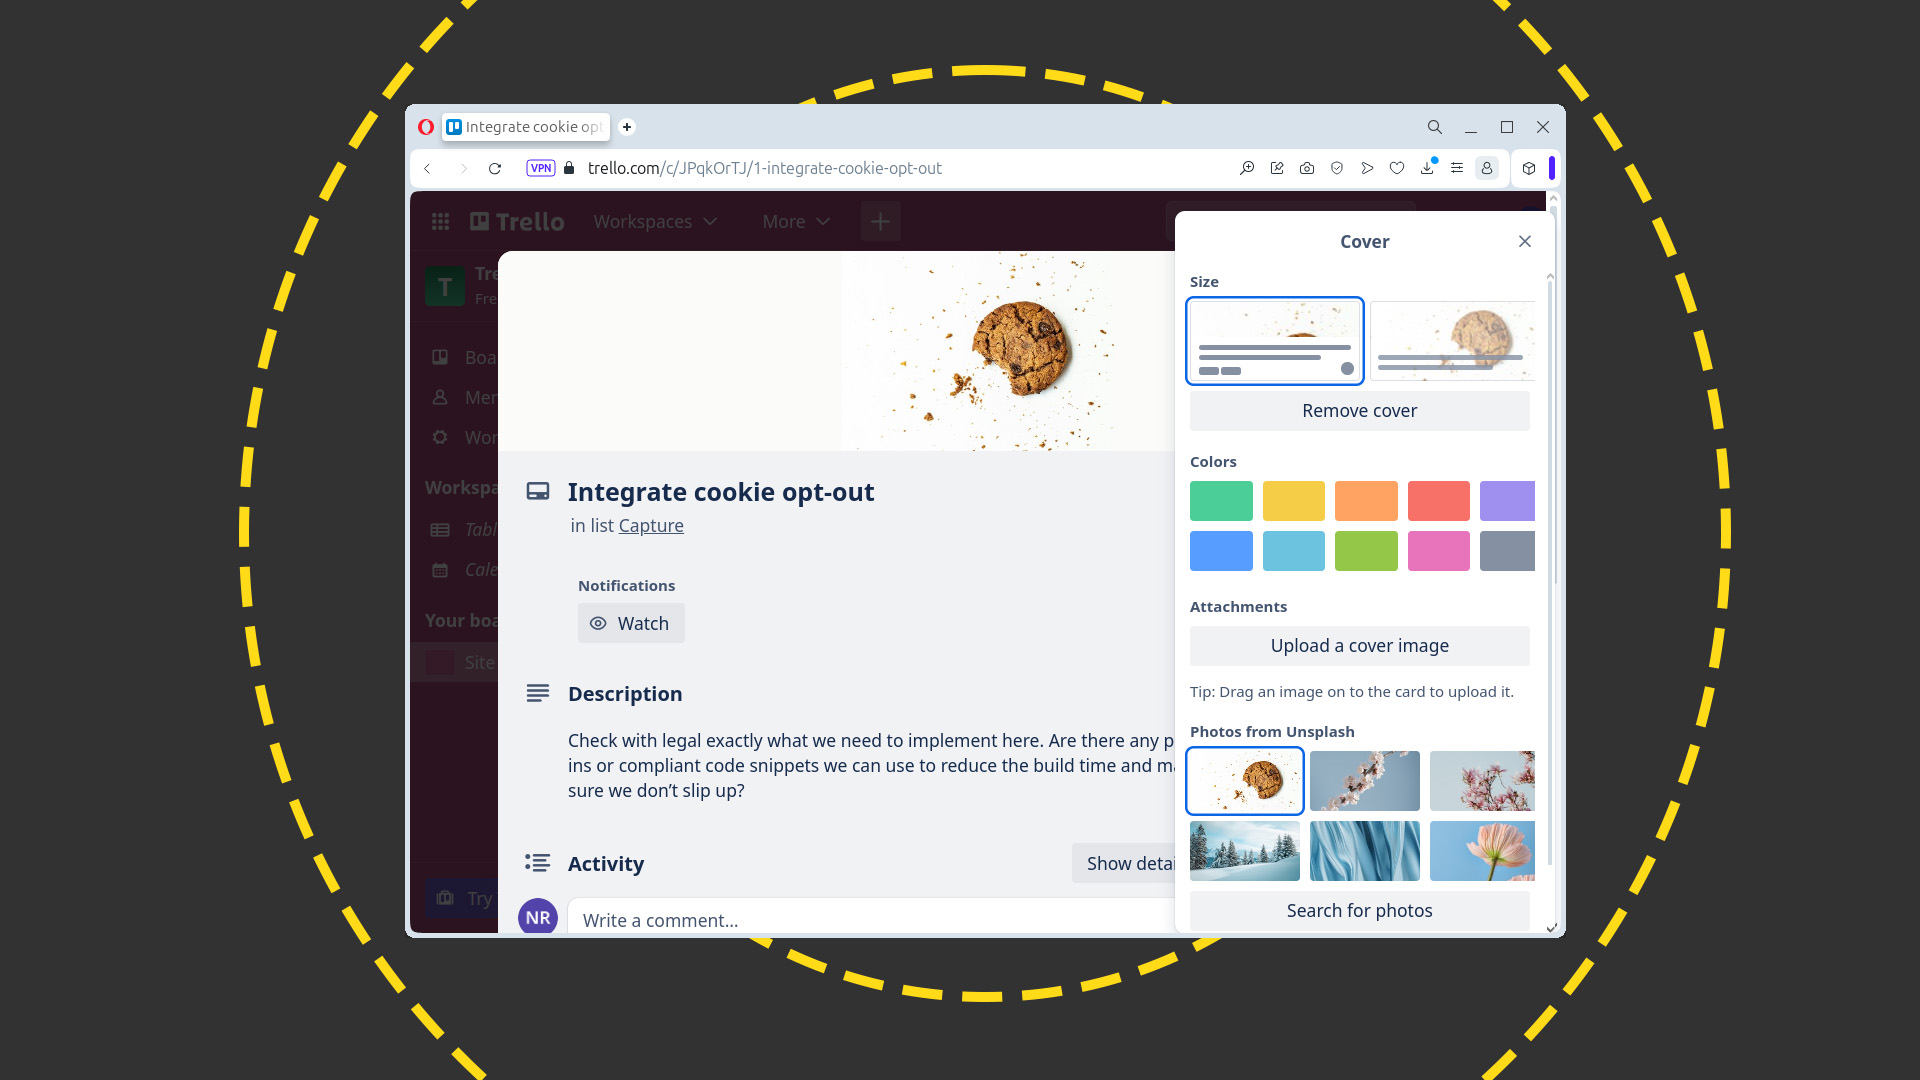
When you've finished fleshing out the job, click the 'x' at the top of the card. You now need to decide which team has responsibility for that job. Most of the work on the new website will originate as a wireframe from the design team, which our coders will replicate using PHP. However, the cookie banner design could be handled when it reaches the design second pass stage. So, in this instance, click and drag the 'Integrate cookie opt-out' card directly onto the Code list to assign that job to that team.
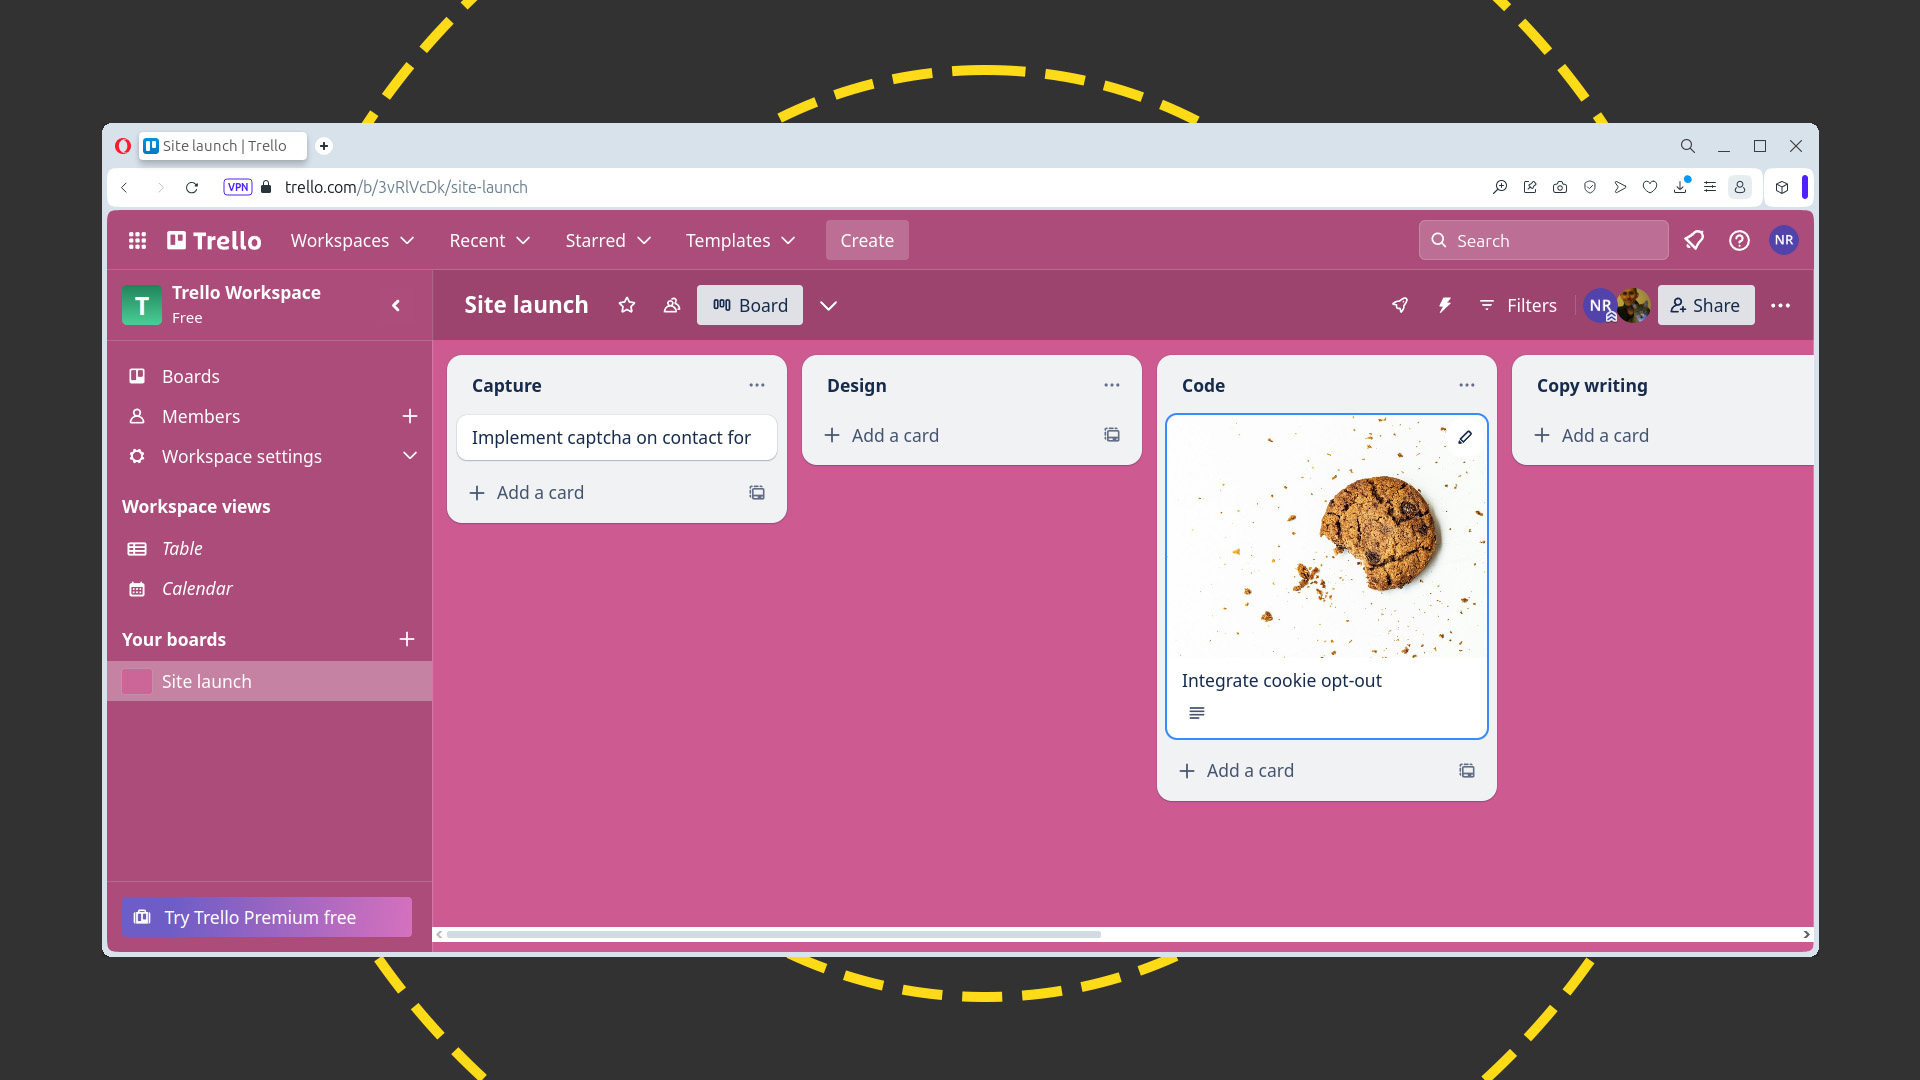
Now repeat the process for the 'Implement capcha on contact form' card, and drag that to the Design column. The design team can work on the look and feel of the captcha before the coding team brings it to fruition.
Create whatever other cards you need, and flesh them out as you've just done for the two cards you created during the sign-up process, then drag them onto the appropriate lists for whichever team has initial responsibility for each one.
As your teams finish work on an assigned card, they can drag it into the appropriate column for the next stage of its evolution. Looking at the Design list in the screenshot below, for example, the captcha job will head for the Code list once it's ready for the next stage, along with the templates for blog posts, color scheme, style guide, media assets, and photos, all of which will be used in coding pages for publication. Other jobs, like the budget for the logo design, can be dragged straight to the Done column as nobody else will need to take responsibility for it once that task is completed.
Similarly, when the code team has finished working on the 'meet the team' and 'privacy policy' pages, and the copywriting team has completed the privacy policy and team profiles, which appear on their list, all four cards can be dragged to the 'Design second pass' list we created earlier. At this point, the design team will know that they have all the assets they need – the content and the code – to put those pages together.
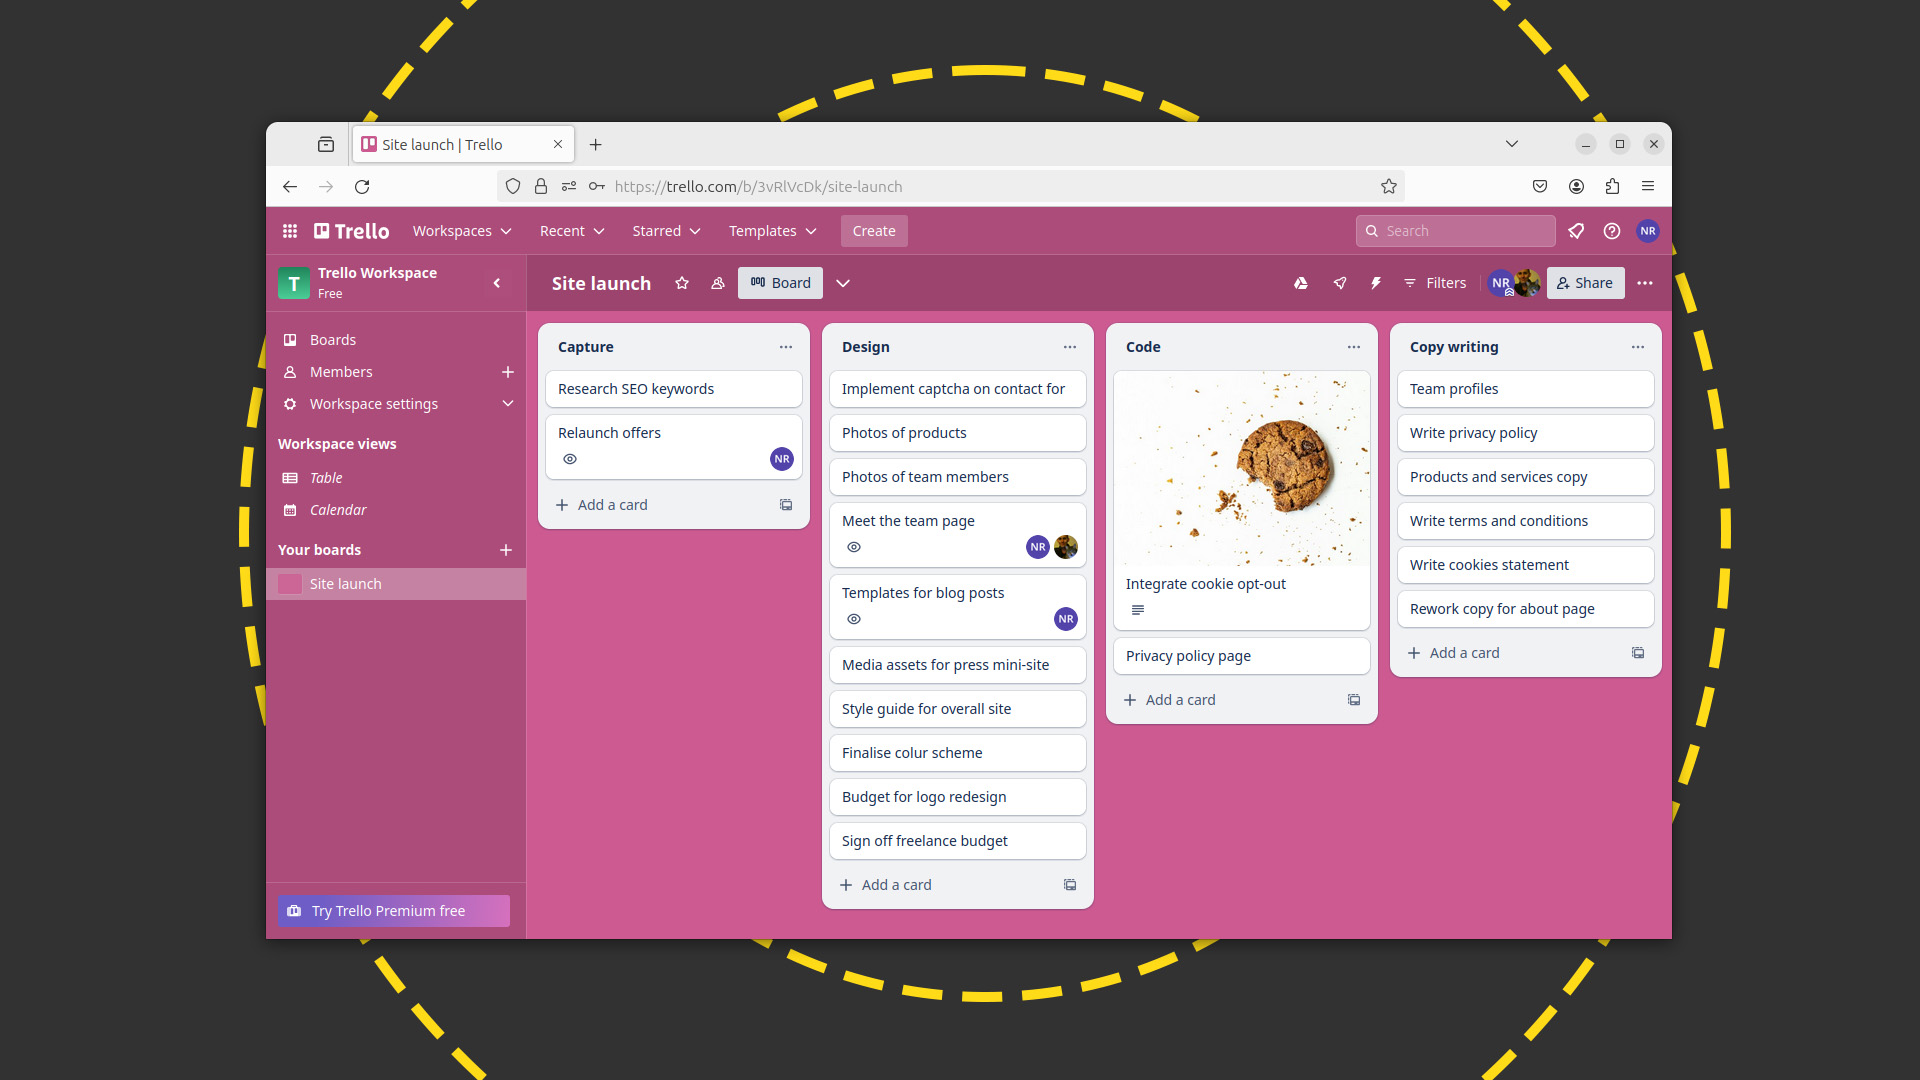
You'll notice that there's effectively a loop in our workflow, with jobs passing through the design team twice. That's so the designers can check that what they created as wireframes has been faithfully replicated in code.
As cards can be dragged in any direction, the coding team could have just dragged them back into the first Design column when the jobs attached to them were ready for checking, but that would imply that, once the design team had finished with them, the logical next step would be the coding team again. The jobs could, in effect, get stuck in a never-ending loop, bouncing back and forth between the two teams. That's why we created a second design list, for jobs that need a 'second pass' to finish off before progressing to user testing.
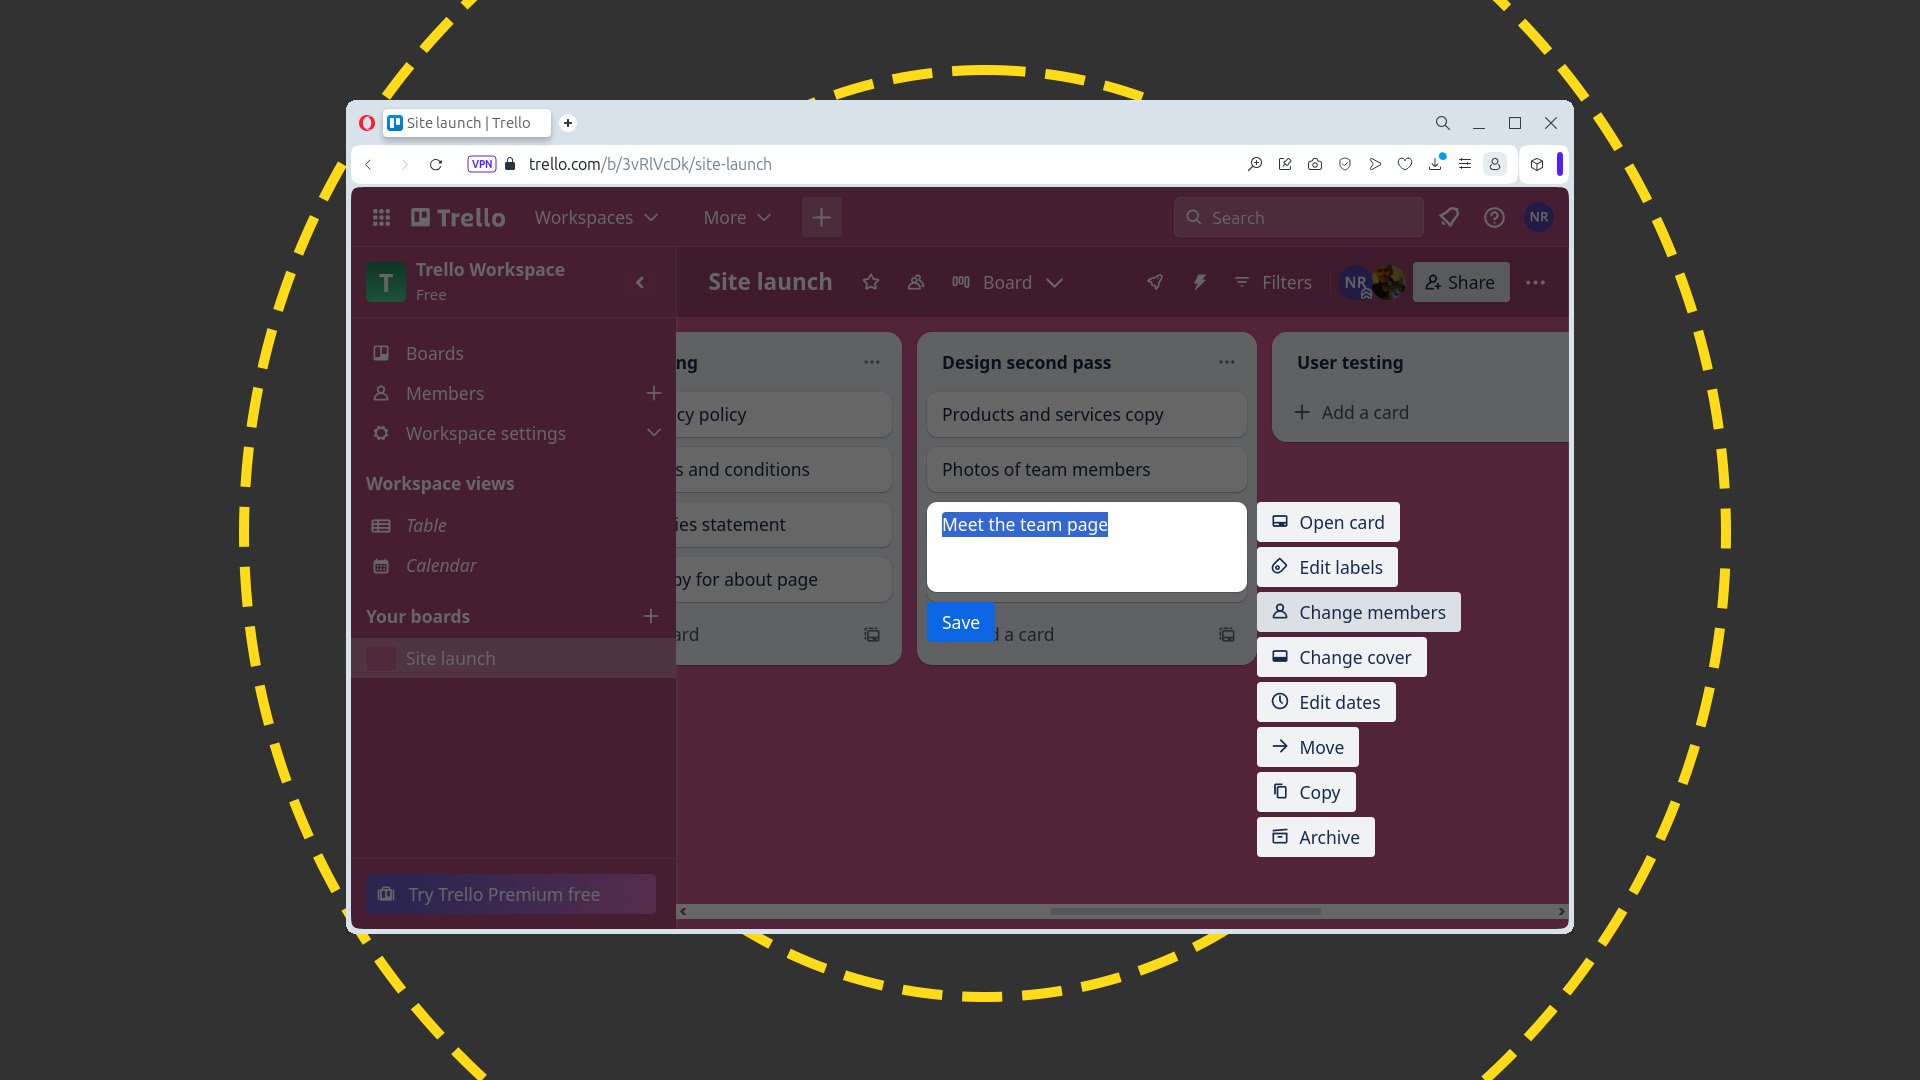
To save the design team keeping an eye on two lists the whole time, it would make a lot of sense for jobs sent to the 'second pass' list to have a staff member attached to them. This can be done quickly and easily without opening the job's full editing dialog by hovering over the card and clicking the pencil icon that appears on the right-hand end. This reveals a menu for adding metadata to the job. Click 'Change members', then the name of the team member to whom responsibility should be assigned.
Trello for business: Reading boards
This process of dragging jobs from one area of responsibility to another lets the whole team see how the project is progressing. Everyone can see in an instant if things are backing up as well as which parts of the team – if any – have nothing or too little to do. This can help managers to reassign jobs or resources.
Individual team members can also check that they're not missing anything they need to be doing and therefore aren't holding up anyone else. Clicking the Filters button above the board reveals a menu, with a 'Cards assigned to me' checkbox. Clicking this clears away all but the cards for which you have responsibility, so you can more clearly see what you should be working on next. Picking a team member from the 'Select members' menu lets you do similar for anyone else on the team.
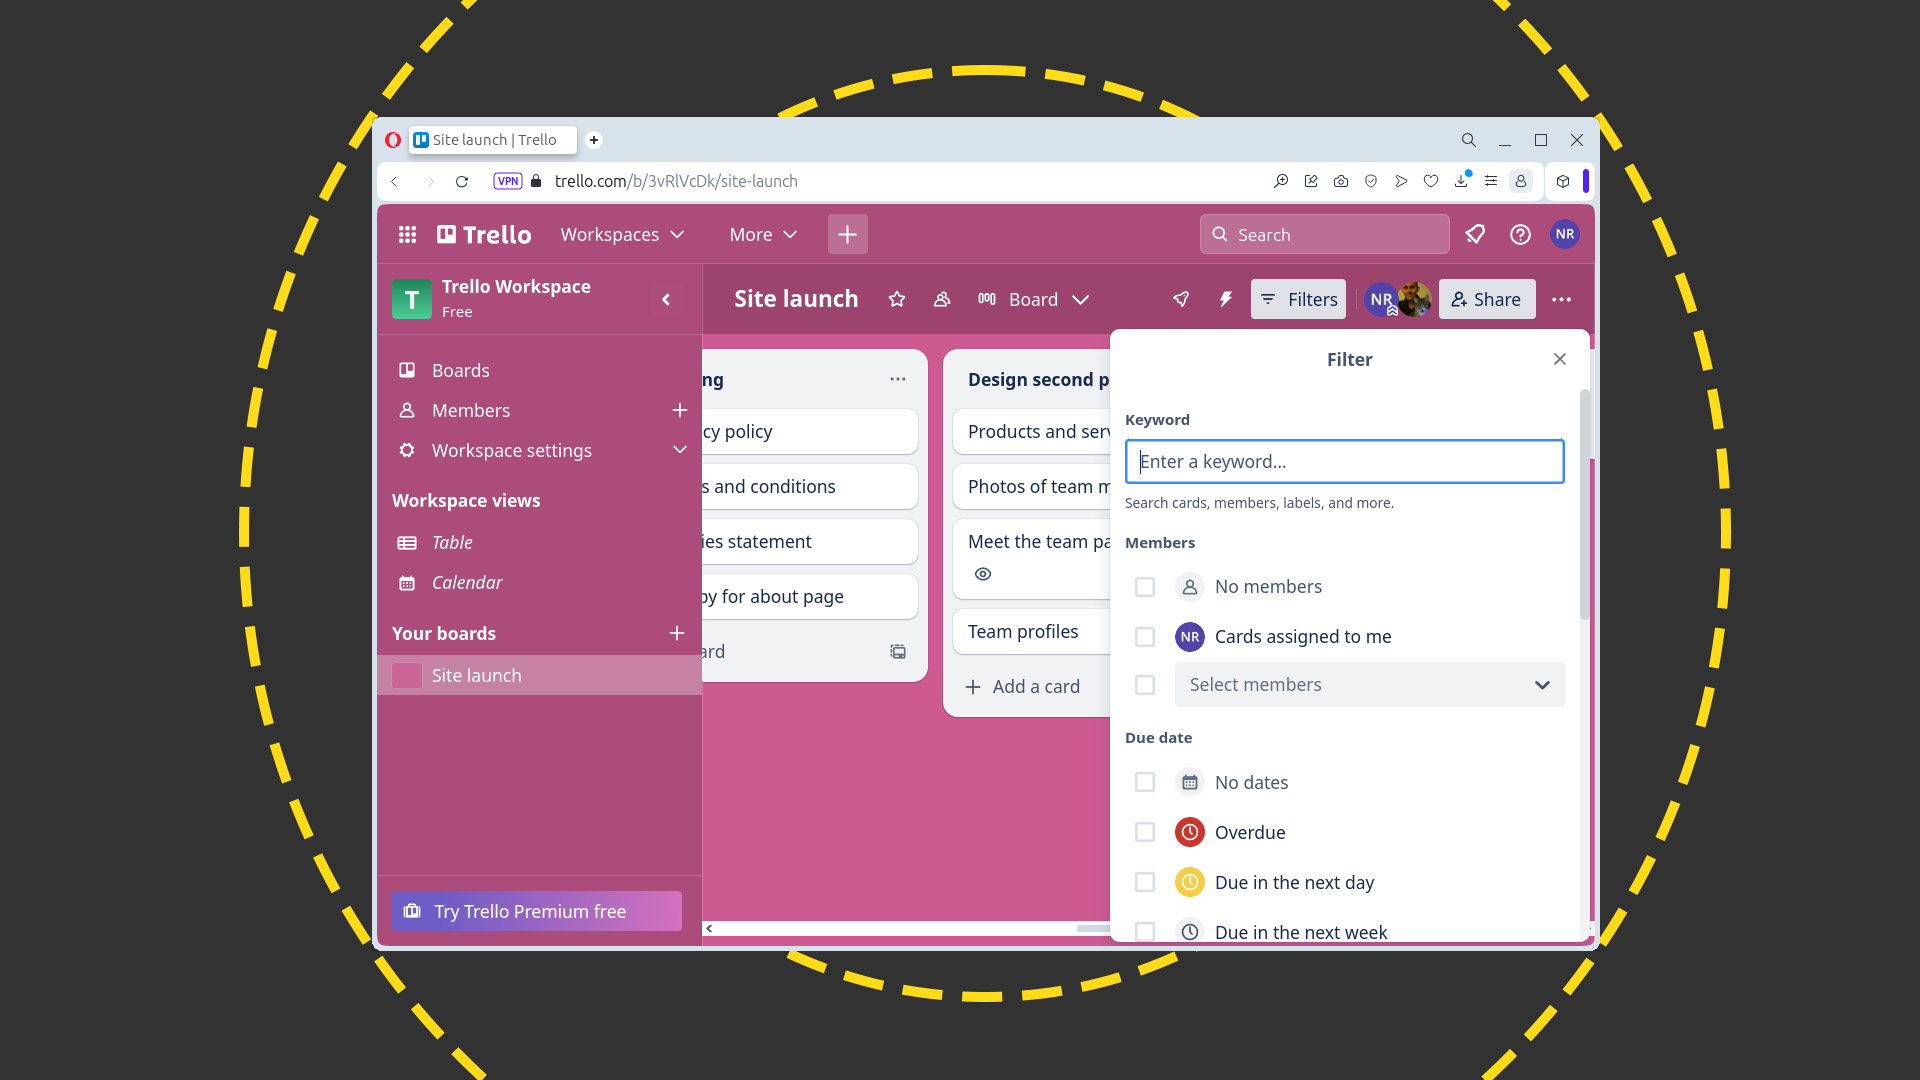
If you do have any team members twiddling their thumbs, it makes sense to assign them to the most pressing task – so long as they have the requisite skillset. In this case, scroll the Filter dialog until you find the Due date options, then use the boxes to isolate jobs that are running late, or approaching a deadline. Or, by scrolling further, highlight jobs that haven't been touched in some time by using the options in the Activity section.
Trello for business: Integrations and automations
As we mentioned when fleshing out the first card, you can add attachments to a card, where relevant, or link directly to a cloud account using what's known as a power-up.
Close any open card to return to the board view, then click the three dots in the upper right corner to open the menu, followed by Power-Ups. Scroll down to Google Drive and click Add.
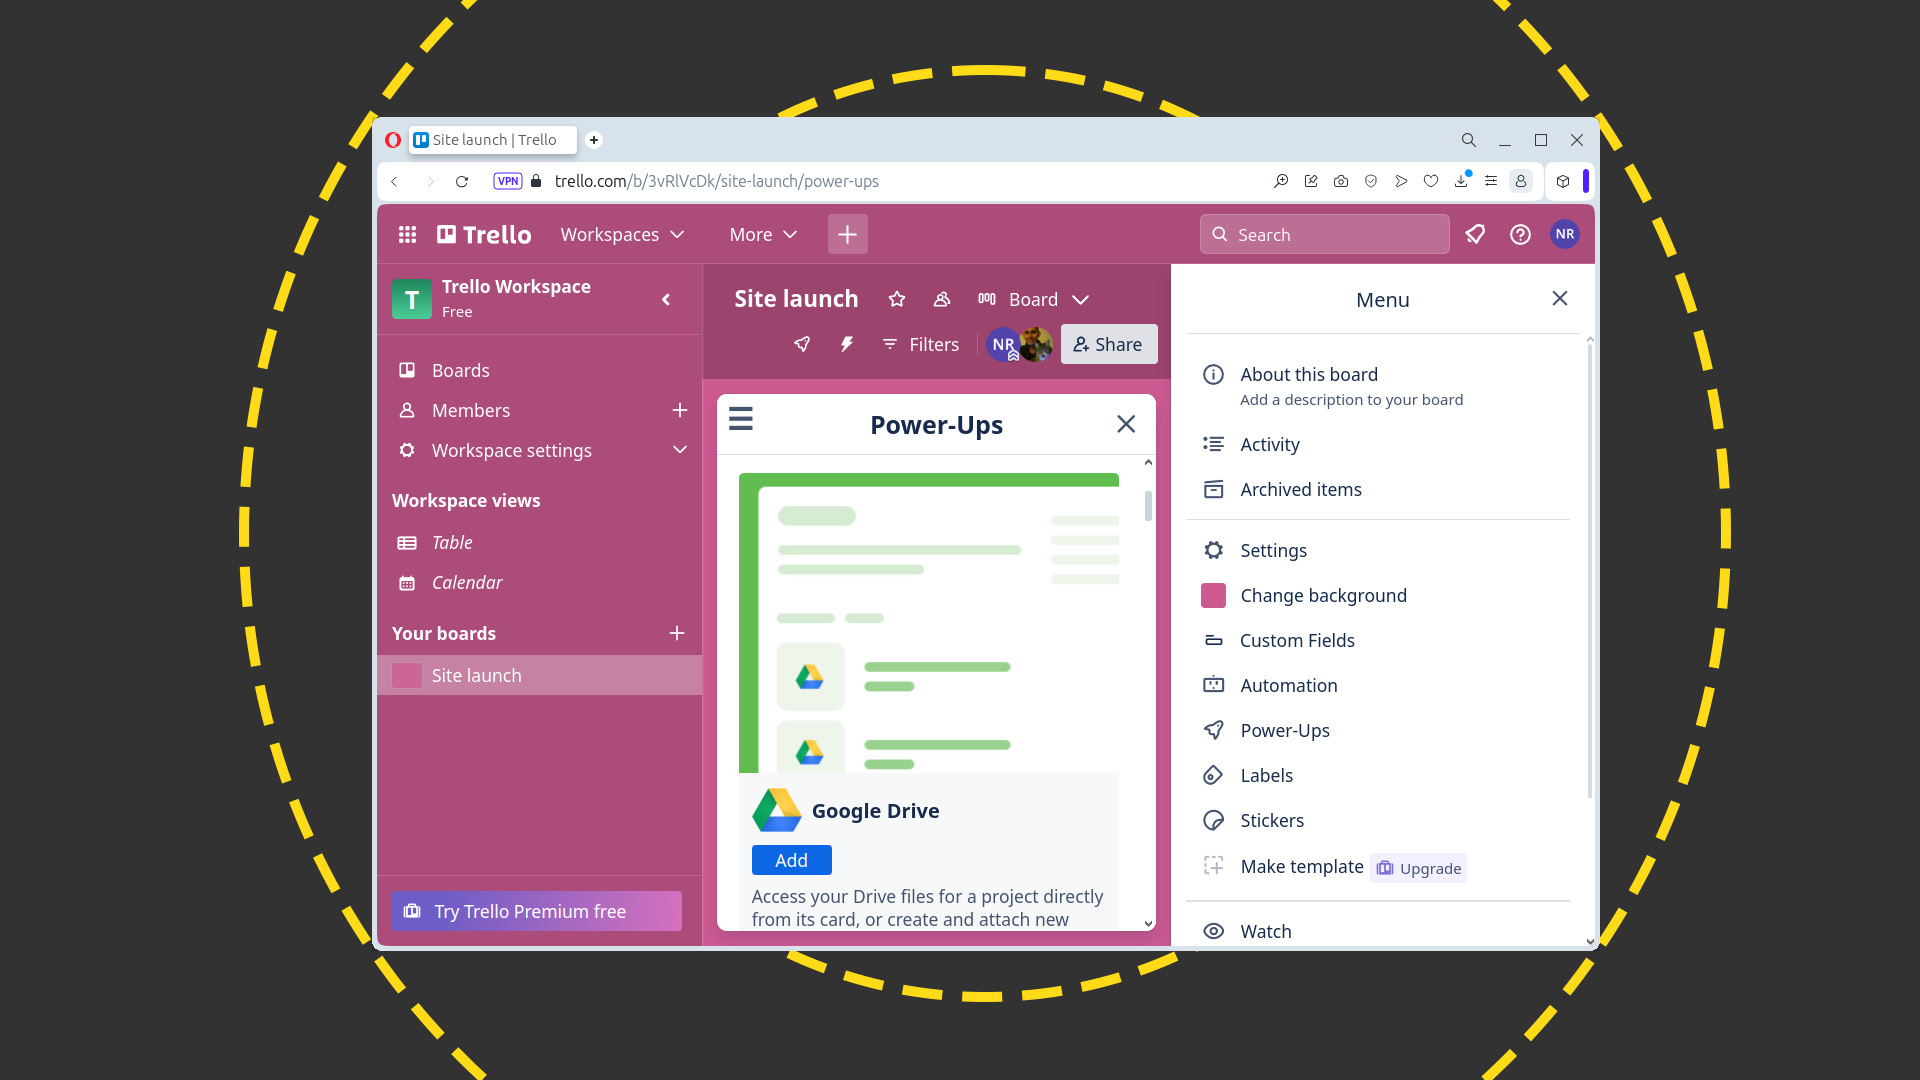
Once the power-up has been integrated, the Add button will switch to Settings. Click this, followed by 'Edit Power-Up settings', followed by Link Google Drive Account. Use the popup that appears to log in to Google Drive, then click the Continue button to share your account details with Trello. Read through the permissions Trello needs and, if you're happy with them, click Allow.
Now open one of your cards, and you'll see that a new Google Drive button has been added to the sidebar. Click this, then choose what you want to do: create a new asset and attach it directly, attach an existing file, or attach a folder. If you chose one of the latter two, navigate through the Google Drive file manager until you find the asset you want to attach to the card, click it, then click Select.
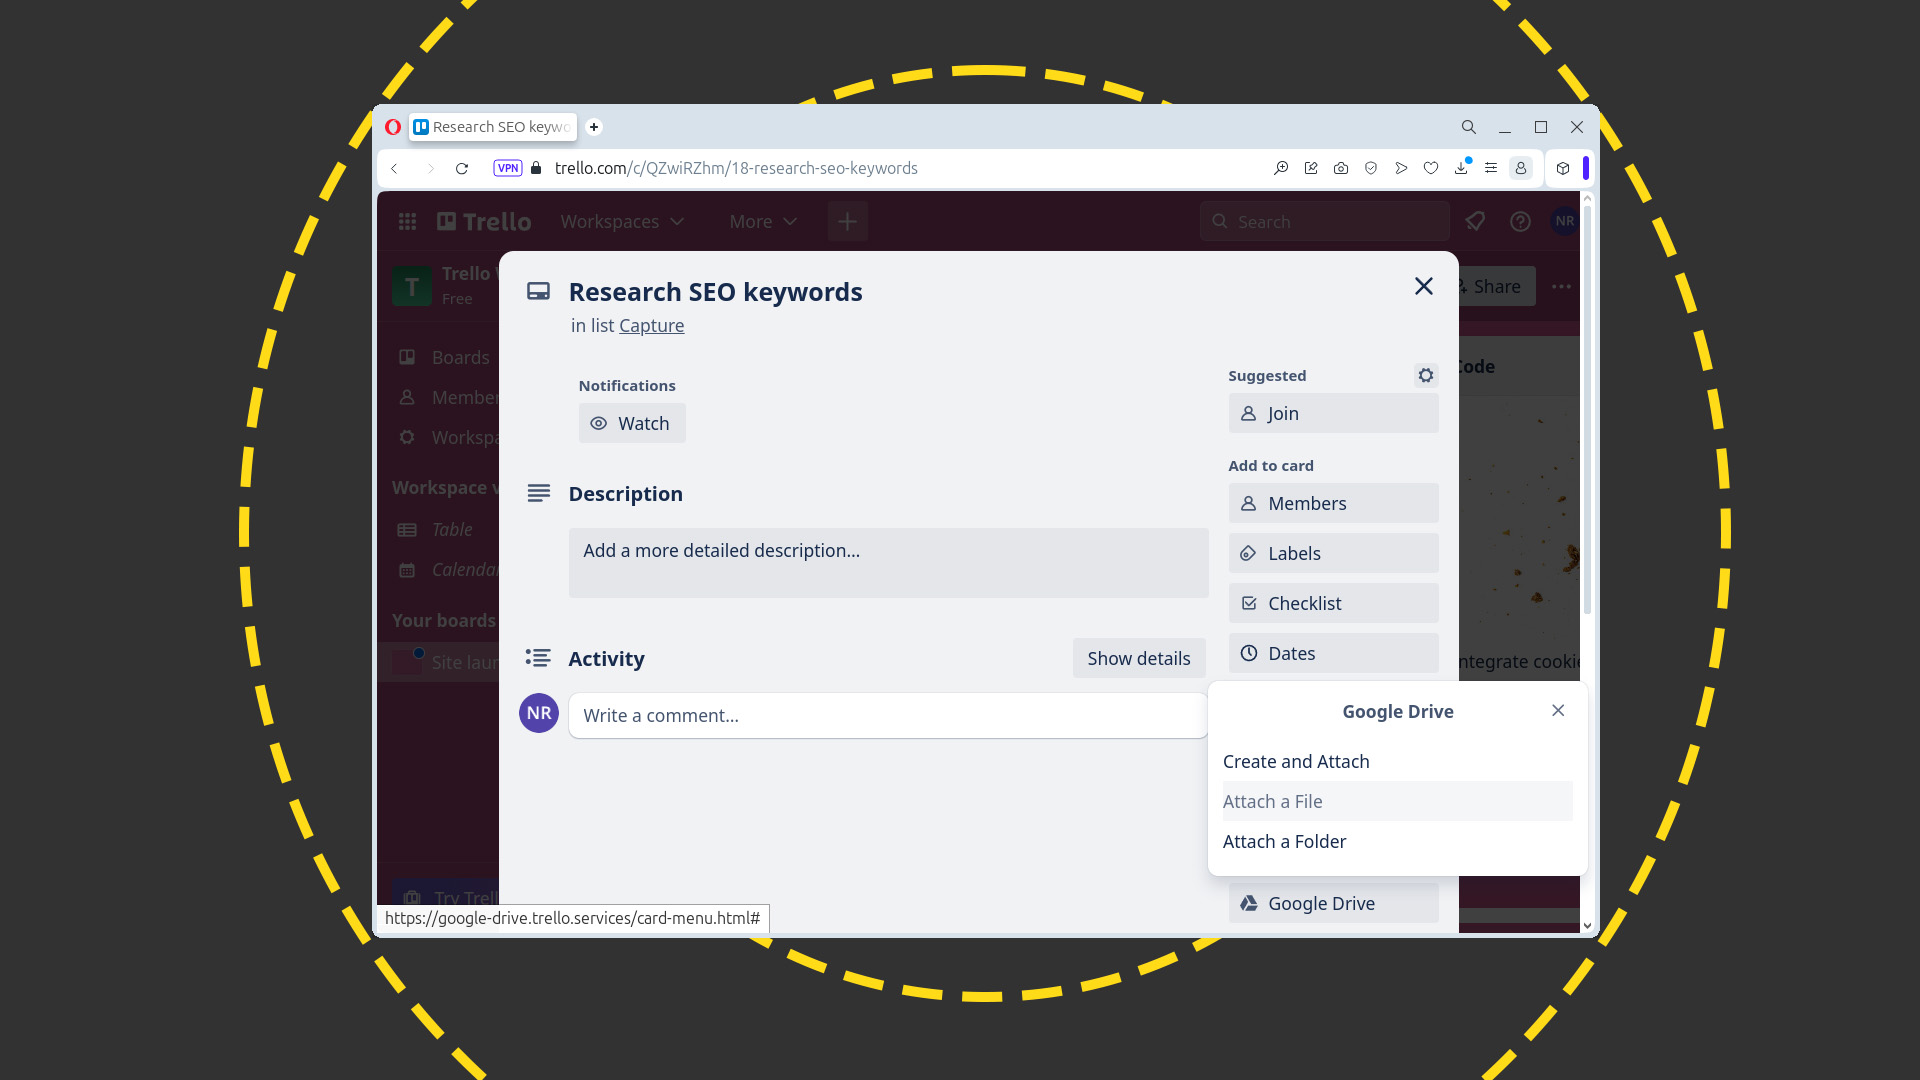
Google Drive is just one of several integrations that you can use. For more details, check out the Power-Ups and Integrations sections of the Trello site.
Similarly, you can reduce the amount of work you need to do to keep your board tidy by using an automation. As we've already decided that it could be a point of confusion in our workflow, let's take another look at that 'Design second pass' list we created and see whether an automation can simplify matters. As things stand, we want to add a specific team member to a card before dragging it to the second pass list to reduce the likelihood of them missing it. But what if the coding team members frequently forget to do this? In that case, you could use Butler, Trello's automation bot, to add a team member and move the card from one list to another, all with a single click.
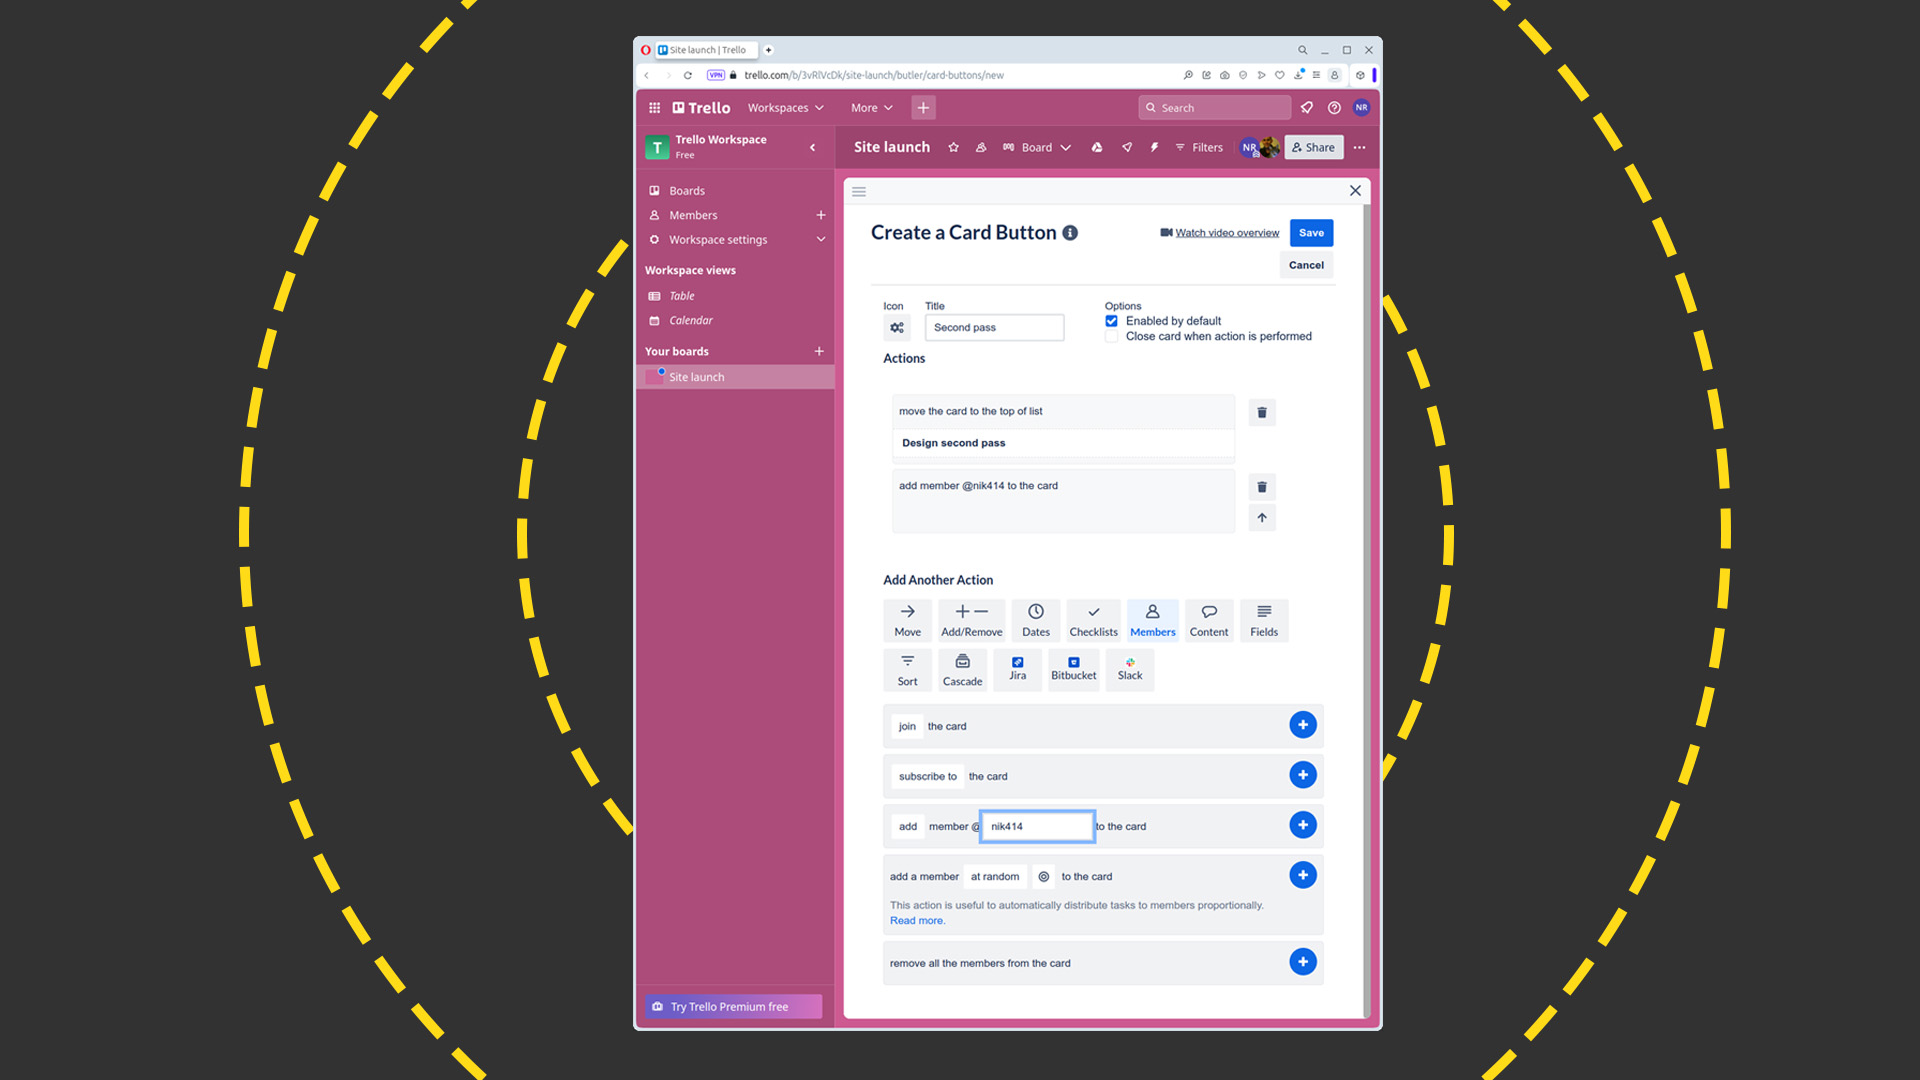
Scroll down the card dialog's sidebar and click 'Add button' in the Automation subsection. Now click 'Create a custom button'. Create 'Create button', and give the button a name. In this instance, we'll call it 'Second pass'. Click 'Add action', then use the buttons and fields to set up an automated workflow. In this case, click in the text field on the 'move' row immediately below the buttons, and select the 'Design second pass' list. Click the '+' at the end of the row and that instruction will be added to the workflow in the Actions section. Now click the Members button and, on the third row down, click in the 'username' text field, click the name of the team member with responsibility for the job, and click '+'.
As you can see from the screenshot below, we've built an automation comprising the two steps in the Actions section. Click Save to complete the process.
The 'Second pass' button you've just created will now appear in the Automation section, in the sidebar of the card dialog, as you can see in the screenshot below. From now, on, rather than manually dragging a card to the 'Design second pass' column and remembering to add a team member with responsibility for that job, your designers only need to click this button. When they do, both steps will be done for them. They can close the card, open the next one, and carry on with their job.
Nik Rawlinson is a journalist with over 20 years of experience writing for and editing some of the UK’s biggest technology magazines. He spent seven years as editor of MacUser magazine and has written for titles as diverse as Good Housekeeping, Men's Fitness, and PC Pro.
Over the years Nik has written numerous reviews and guides for ITPro, particularly on Linux distros, Windows, and other operating systems. His expertise also includes best practices for cloud apps, communications systems, and migrating between software and services.