How to build a Raspberry Pi-powered robot
Want to create your own tiny PiBot? Here's how

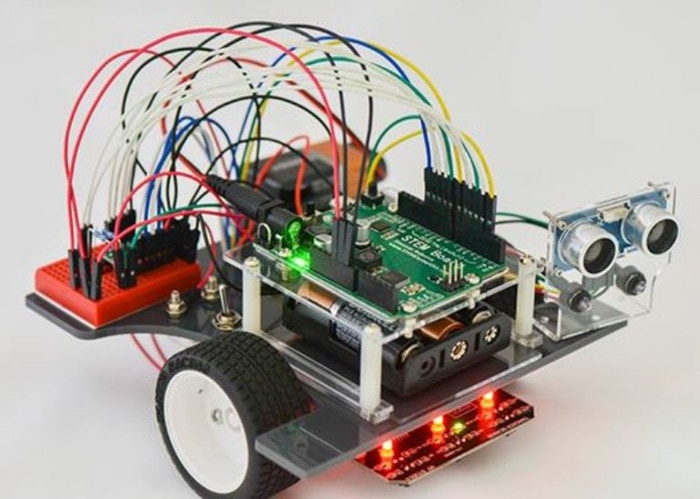
The tiny but potent PC that is the Raspberry Pi can be built into all manner of amazing projects, but this is arguably one of the most impressive tricks - creating a working robot.
Of course, building a Pi-powered robot can take many forms. There are ready-made kits that add a robot arm to your Pi for just a few pounds, cheap and cheerful 'mouse' style chassis that simplify the build, and highly technical professional creations that can operate in the harshest environments around. One team created the PiTank (including a functioning ping-pong ball cannon), while another team of scientists investigating volcanoes used a Pi-powered robot to investigate and map active fissures - the only limit is your imagination!
To build a robot buggy, you'll need the following components - as mentioned, you can shortcut the process by buying a kit, but we'll deal with the individual component parts here. We're also going to assume you've got a working Pi with Raspbian installed, have updated it and can either connect to a monitor or SSH into it to write and run scripts.
For a basic buggy you'll need the following tools and components:
- Raspberry Pi
- Motor controller board (L298N Dual H Bridge DC Stepper Motor Driver Controller Board)
- 2 12V DC motors
- 2 wheels
- 1 AA battery holder
- 4 AA batteries
- Ball caster
- Wire or jumper leads
- USB power bank
- Screw driver
- Soldering iron
- Breadboard
- VL53L0X time-of-flight range finder or ultrasonic distance sensor (optional)
- 2 line following sensors (optional)
First up, solder wires to the motor terminals, then attach the other ends to the motor controller board. If you're using the popular L298N Dual H Bridge DC Stepper Motor Driver Controller Board, then that'll be OUT1, OUT2, OUT3, and OUT4.
Next you'll need power for the motors, so take the AA battery holder and insert the red wire into the VCC terminal block. The black wire goes into the GND block. It is important that you get this the correct way around.
Some boards fit directly onto the GPIO pins, such as the popular Explorer HAT, but this one needs to be wired in as follows:
Sign up today and you will receive a free copy of our Future Focus 2025 report - the leading guidance on AI, cybersecurity and other IT challenges as per 700+ senior executives
| GPIO pin | connects to | board pin |
| 7 | <> | In1 |
| 8 | <> | In2 |
| 9 | <> | In3 |
| 10 | <> | In4 |
| GND | <> | GND |
Now you'll have the basics of a working robot, but one last vital logistical question is which is your left motor and which is your right motor. You also need to know which way they are driving to go forward, and which way they are driving to go backwards.
Label the motors with 'L' and 'R' with a marker pen, and add a forward arrow. Now it's time to write a test script:
Open a Python shell by clicking Menu > Programming > Python 3 (IDLE). Then click File > New File to open an empty script and enter the following commands:
from gpiozero import Robotrobby = Robot(left = (7, 8), right = (9, 10))
Save your file and call it robby.py or similar. You can then run it by pressing F5 on your keyboard.
Now switch over to the shell and type the following to observe which way the motors turn.
robby.forward(0.4)robby.right(0.4)
If the right motor spins, you're good; if not you'll need to swap them round by swapping the pin numbers in your original script:
robby = Robot(left = (9, 10), right = (7, 8))
Next check your motors are both turning the right direction:
robby.forward(0.4)
If the motors are both turning clockwise you're good - if not you'll need to adjust the pins in the initial script again, for example:
robby = Robot(left = (9, 10), right = (8, 7))
Now we're ready to put the bot together - there's many ways to construct a chassis, from 3D printing to laser cutting, but first it's best to use a cardboard box to get the hang of the layout. Experts recommend a chocolate box because the card is nice and rigid, but the choices are endless!
The chassis needs to contain the Raspberry Pi, motor controller and batteries, and needs to allow a pair of wheels to be mounted. Cardboard also allows you to experiment with fitting sensors later on, such as a couple of line sensors, and an ultrasonic distance sensor or a lidar sensor.
You'll essentially end up with a motor on each side at one end of the box, attached to an external wheel, and the ball caster at the front. Locate your USB power bank in the box, along with the Pi, controller board and motor battery pack.
You should now be able to boot your Pi (from the USB pack) and begin to program it.
There are five basic commands to move your robot, that can be combined to make it move in different ways:
robot.forward()robot.backward()robot.right()robot.left()robot.stop()
For example, here's a simple script to make it go in a square shape (although you may need to tweak the sleep functions to get the motions correct).
from gpiozero import Robotrobot = Robot(left = (7, 8), right = (9, 10))while True:robot.forward()sleep(3)robot.stop()robot.right()sleep(1)robot.stop()
Now you can experiment with your bot, working your way up from following simple shapes to navigating complex mazes, and adding arrays of sensors - enjoy!
Thanks to the Raspberry Pi foundation for the official Robot buggy project.