Best Windows 10 tips and tricks for power users
A roundup of some of the most sophisticated Windows tweaks designed for power users in mind

6. The translucent taskbar
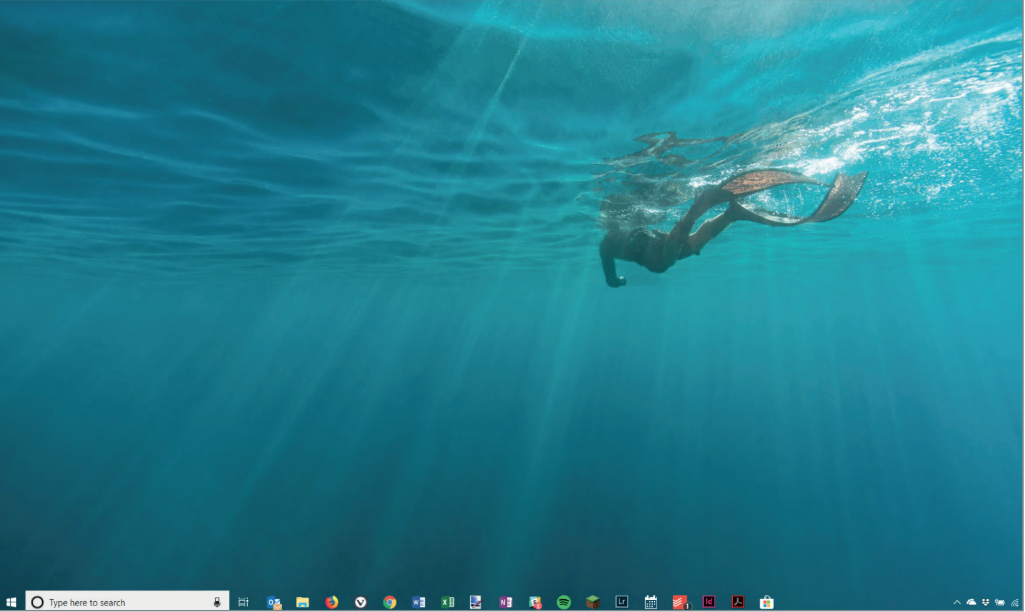
While we're making things see-through, how about a translucent taskbar? It gives Windows a much cleaner look, especially if you've got a tidy desktop. The look works best with relatively plain wallpapers that haven't got too much fussy detail at the foot of the screen, such as the diver wallpaper (one of the Windows 10 defaults) in our screenshot.
This can be achieved by downloading a small app from the Windows Store called TranslucentTB. Once installed, it places an icon in your system tray that allows you to fiddle with different settings.
By default, the taskbar will be translucent if you've got no full-screen windows open, but it goes back to black when you have or when you open the Start menu. You can fiddle with the settings and many others from the system tray until you get it just right.
7. Go dark
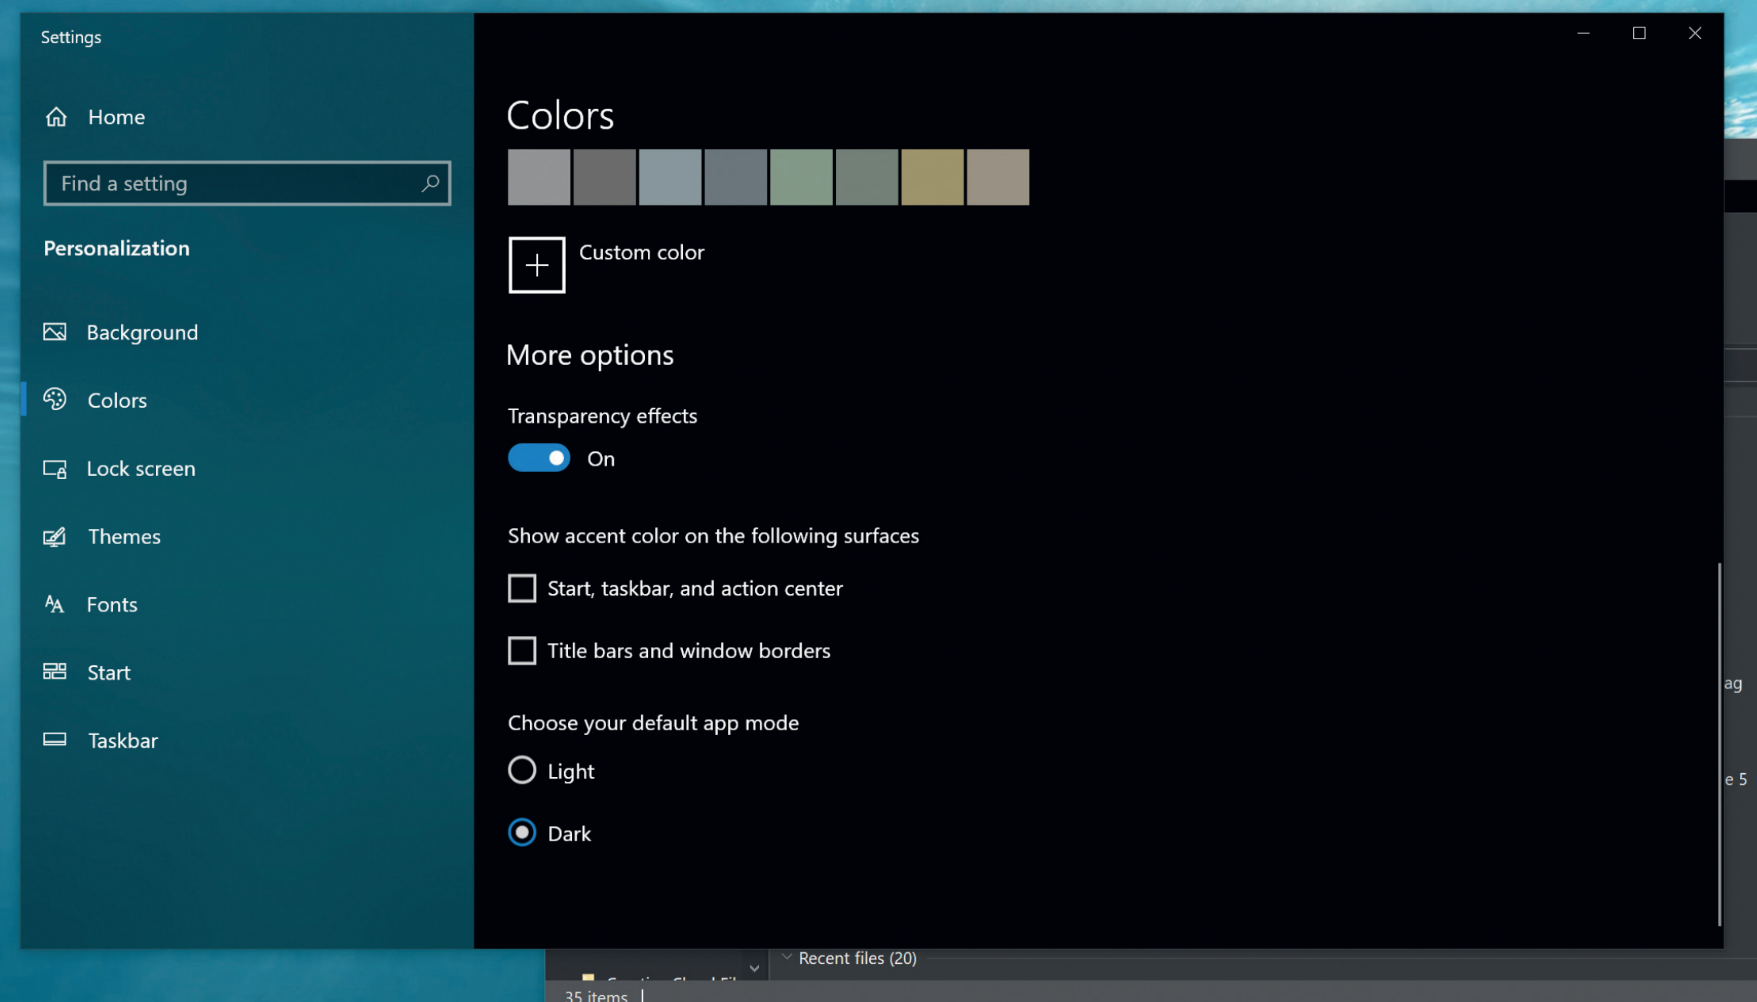
Windows has a new Dark Mode, something which is very much in vogue at present. With this setting enabled, Explorer windows, the Settings menus, Microsoft's bundled apps and even some third-party applications are given a charcoal makeover.
The dark windows can take a little getting used to, and it's more difficult to see where one window starts and another ends when you have two windows overlapping one another.
That said, the dark menus definitely reduce the degree of glare you get from the screen, especially on big desktop monitors. Whether that will have any long-term eyesight benefits is impossible to say, but it certainly can't do any harm.
8. Open web files without saving them first
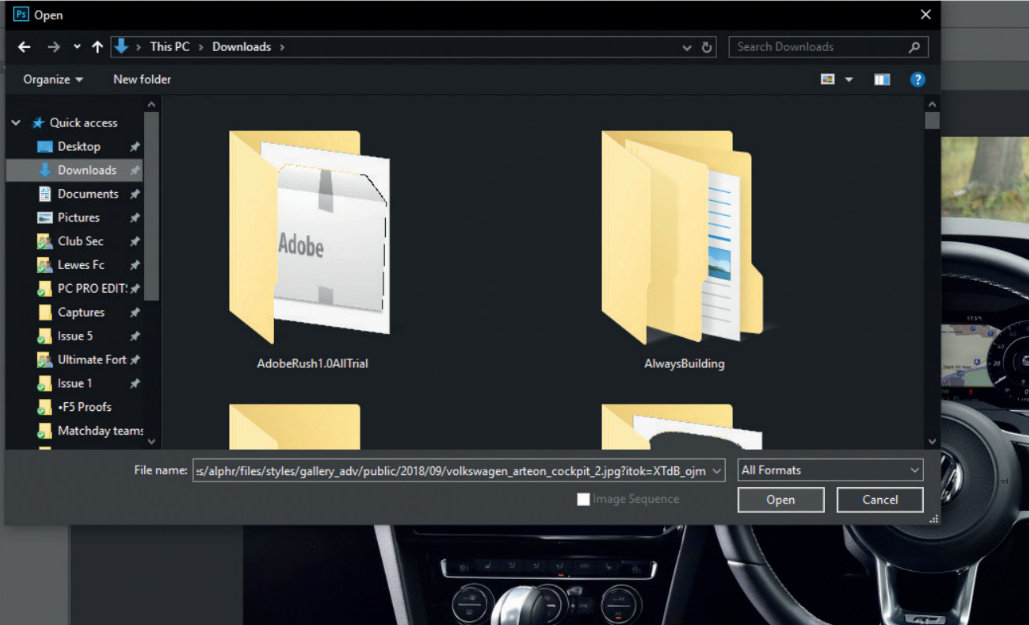
Falling into the Michael Caine category ("not a lot of people know that"), did you know that you can type a web address into the standard Windows file/open browser?
Sign up today and you will receive a free copy of our Future Focus 2025 report - the leading guidance on AI, cybersecurity and other IT challenges as per 700+ senior executives
What use is that, you might ask? Well, let's say you've found an image from an online photo library and want to open it for editing in Photoshop. Instead of saving the file locally and then opening from Photoshop, you can right-click on the image to copy its URL, open Photoshop and then click File | Open. When the file browser appears, paste the web address into the "File name" bar and it should open automatically.
It works for pretty much any type of file. Need to download a PDF form from a website? Click to copy the PDF's file location, open Acrobat and repeat the File | Open and paste routine. Job done.
9. Retrieve multiple items from your clipboard
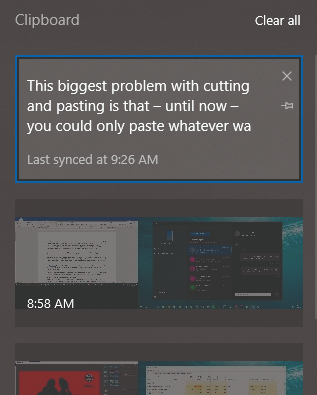
This biggest problem with cutting and pasting is that until now you could only paste whatever was the item copied to the clipboard. That all changes with Cloud Clipboard.
Press Windows+V and you should see a small window appear with a back history of anything you've added to the clipboard. That could be code snippets, text, images, screenshots, whatever.
If you want to select the item before last, you just click on it and it's pasted automatically into the active window.
It's called Cloud Clipboard, because it can (optionally) work across multiple devices. Copy a web URL on your laptop in the office, for instance, and you can helpfully retrieve it later on your home PC.
You can clear out the Cloud Clipboard at any time if you've copied sensitive information, such as a password. You can also pin items to the Clipboard, such as a boilerplate email reply. We've only been using the tool for a day or two and it's already become faintly indispensable.
10. Set up a Linux VM in minutes
Dual-booting into Linux for a spot of dev work, say was always a considerable faff. Firstly, the installation was a trudge, requiring bootable USB drives and often a workaround for Windows Secure Boot, which often snared genuine installations in a bid to thwart malware. Then you had to shut down Windows to access the Linux environment.
Windows 10 Pro has done away with all of this hassle in the form of Hyper-V Quick Create. With this system, it's possible to create a new Ubuntu virtual machine in as few as three clicks and have yourself a slick-performing VM within minutes.
This is all thanks to Canonical and Microsoft working together to support Enhanced Session Mode. In this mode, the VM adopts the Remote Desktop protocol, letting you resize the client window, copy and paste between virtual machine and the underlying Windows 10 OS, and with automatic sharing of folders between guest and host. In effect, Ubuntu runs like a desktop application, allowing you to hot-swap between Ubuntu and Windows at will.
How to set it up
First, you must type "Windows features" into the Windows 10 search bar and select the option to "Turn Windows 10 features on and off". Hyper-V virtualisation isn't switched on by default in Windows 10 Pro, it needs to be activated.
In the Window that appears, tick Hyper-V. However, don't assume as we did that by ticking that box, you'll also activate everything inside its submenus. Instead, click on the plus sign next to Hyper-V and also ensure that Hyper-V Management Tools and Hyper-V Platform are ticked, and then the items in their submenus. Without these, the hypervisor will simply stall on launch.
Once you've ticked all of the correct boxes in the submenus and clicked OK, Windows will need to reboot to install the necessary components.
When you're back at the desktop, type "Hyper-V" in the Windows 10 search bar and you should see the option to open Hyper-V Quick Create.
Here you'll be asked to create virtual machines for one of two operating systems: the Windows 10 dev environment or Ubuntu 18.04 LTS. Don't get too excited about the Windows 10 option, by the way this isn't a juicy way to run up free Windows 10 licences. It's an evaluation copy of Build 1709 that will "expire after a pre-determined amount of time".
Choose which operating system you wish to use and click More Options if you want to change the name of the VM from the default name of the OS. Then click Create Virtual Machine. Windows will now download the OS of your choice Ubuntu is a 1.5GB download compared to Windows 10's hefty 12.7GB.
Once it's installed, you should end up at the Hyper-V Manager Window with the option to fire up your VM for the first time. If you want to fiddle with the VM's settings beforehand, now's the time to do it. Click on Ubuntu in the right-hand menu and select Settings from here you can determine how much memory to assign to the VM, the number of virtual processor cores it's afforded and so forth.
In future, you can also take Checkpoints from this menu, allowing you to roll the virtual machine back to its current state, in a similar vein to System Restore points in Windows.
Adam Shepherd has been a technology journalist since 2015, covering everything from cloud storage and security, to smartphones and servers. Over the course of his career, he’s seen the spread of 5G, the growing ubiquity of wireless devices, and the start of the connected revolution. He’s also been to more trade shows and technology conferences than he cares to count.
Adam is an avid follower of the latest hardware innovations, and he is never happier than when tinkering with complex network configurations, or exploring a new Linux distro. He was also previously a co-host on the ITPro Podcast, where he was often found ranting about his love of strange gadgets, his disdain for Windows Mobile, and everything in between.
You can find Adam tweeting about enterprise technology (or more often bad jokes) @AdamShepherUK.
