How to build your own firewall with pfSense
Create your own physical or virtual appliance with this free-to-use open source software

Andrew Webb

Sign up today and you will receive a free copy of our Future Focus 2025 report - the leading guidance on AI, cybersecurity and other IT challenges as per 700+ senior executives
You are now subscribed
Your newsletter sign-up was successful
A firewall is a network security device that monitors incoming and outgoing network traffic and permits or blocks data packets based on a predetermined set of security rules. It's a must-have for businesses that have mighgrated their IT infrastructure and services to the cloud, as an enterprise firewall will handle your internet connection and any site-to-site or site-to-cloud VPN requirements.
While crucial, the licensing costs for firewall devices from Cisco, Juniper, Sonicwall et al are often extremely high, and many IT administrators dread the arrival of the annual licence renewal invoice, award that it'll eat up a huge chunk of their yearly IT budget.
Enter pfSense, an open source enterprise firewall based on FreeBSD that offers features comparable to many of the most expensive big-name options on offer, along with a wide range of packages available to extend its capabilities. The best part is, as an open source solution, pfSense is completely free, and all of its features are available without any commercial licensing requirements.
Support for pfSense is provided by Netgate, which also manufactures network appliances that use the operating system.
This tutorial will take you through the installation and basic setup of a pfSense device. We will be using the scenario of a business with no on-premises servers, using cloud services or hosting for their IT requirements.
Hardware requirements
In terms of hardware, pfSense requires a CPU with a base frequency of 600Mhz, at least 512MB RAM, one or more compatible network interface cards (NICs), a bootable USB drive or CD/DVD-ROM for initial installation, and at least 4GB of available storage - either on a hard disk, or a flash device such as an SD card.
However, the exact requirements you will require will depend on the number of rules and VPNs that you have on your device, along with the amount of data folowing through it.
Sign up today and you will receive a free copy of our Future Focus 2025 report - the leading guidance on AI, cybersecurity and other IT challenges as per 700+ senior executives
VPN performance, particularly, is dependent on how much processor power your endpoint has, and depending on the size and complexity of your local network layout, you may want a device with more than two network interfaces.
Purpose-built pfSense devices are available from many manufacturers, including the makers of pfSense themselves. However, you can also set it up on a virtual machine running on your choice of hypervisor, or build your own using a standard desktop PC or server.
Whatever hardware you’re using, the setup process is the same. Hook up a monitor and keyboard to your device or use the virtual console if you are installing on a virtual machine. Do not connect any of the network interfaces to a network yet: we’ll get to that later in the installation and setup process.
Step 1: Install pfSense on your device
Download the installer from the pfSense website, taking care to get the version that matches your environment and preferred installation method. Burn the CD or write the image to a USB drive as required.
Boot your device from the installation media you created and wait until it has completed booting, and displays the software license screen. Go through and accept the license terms and move on to the installation. Select “Install” from the menu, choose the correct keyboard layout for your region, then select continue.
From the next menu, select automatic partitioning and hit enter to continue.
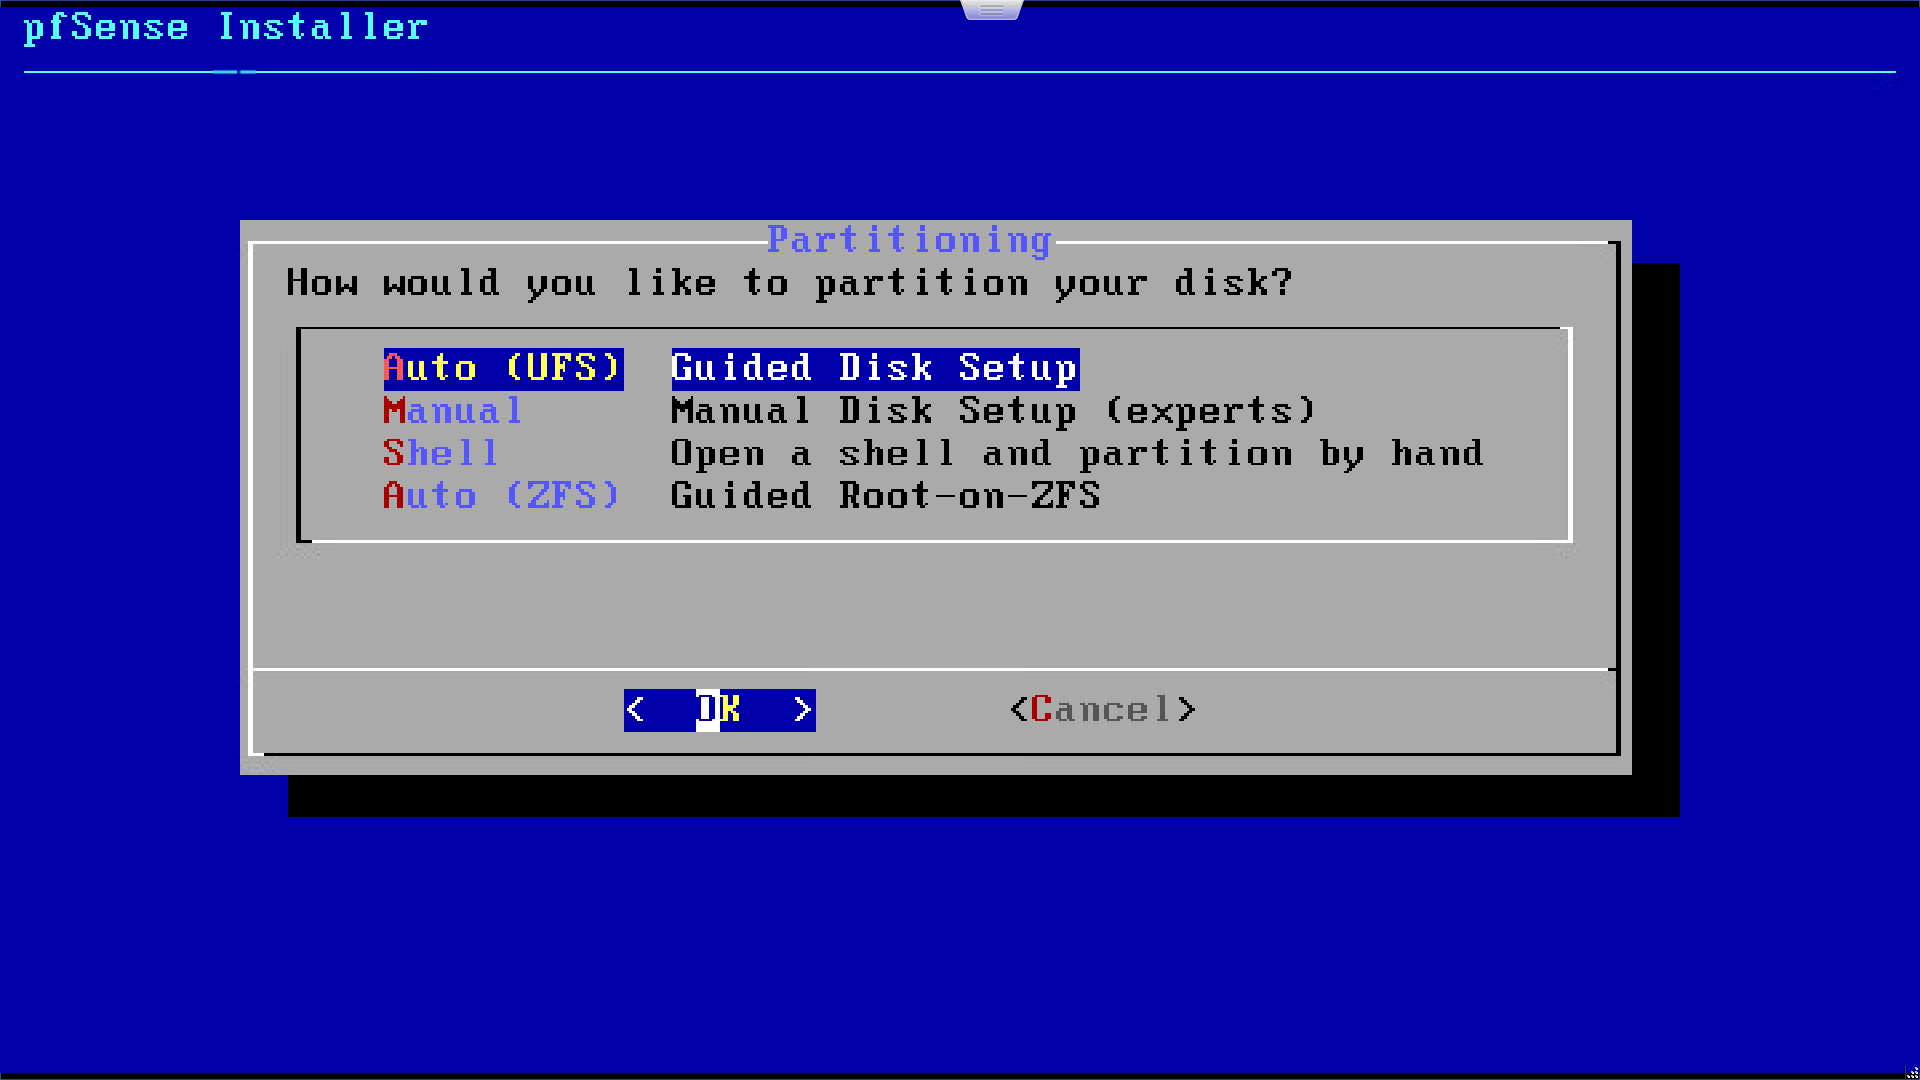
pfSense will partition the disk, and move straight on to the installation. When this has finished, say no to opening a shell to edit the system. Finally, remove the installation media and hit enter on the next screen to reboot into your new pfSense system.
Step 2: Console configuration
Once the system has rebooted, you’ll be prompted to set up basic networking. Answer no when asked if VLANs should be set up now and move on to the network interface setup. Hit “a” to start auto-detection of the WAN interface and follow the instructions on screen, connecting the cable when required, in order to correctly identify the interface. Repeat the process for the LAN interface. Don’t forget to physically label the interfaces on the device as well.
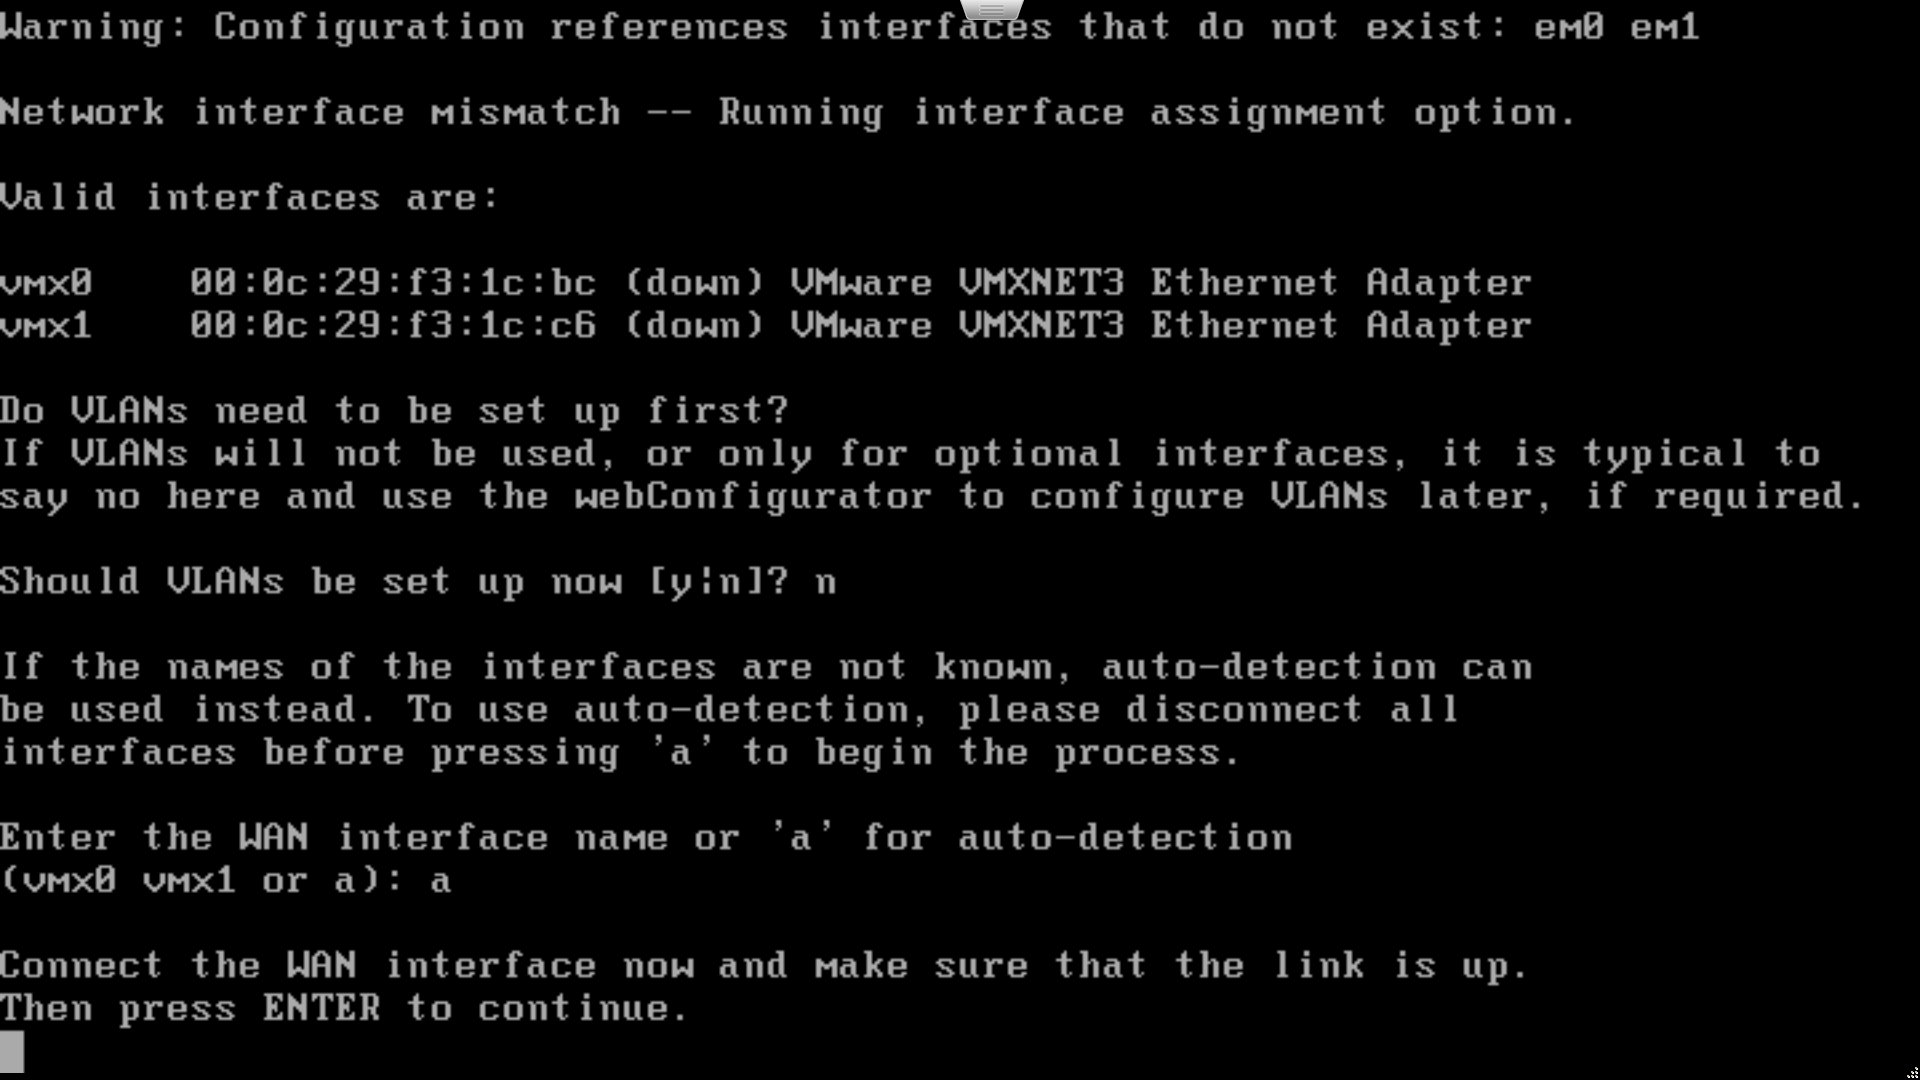
Once you have both the LAN and WAN interfaces identified correctly, hit “y” to continue. pfSense will carry on booting, then display the status of the network interfaces and present you with the console admin menu.
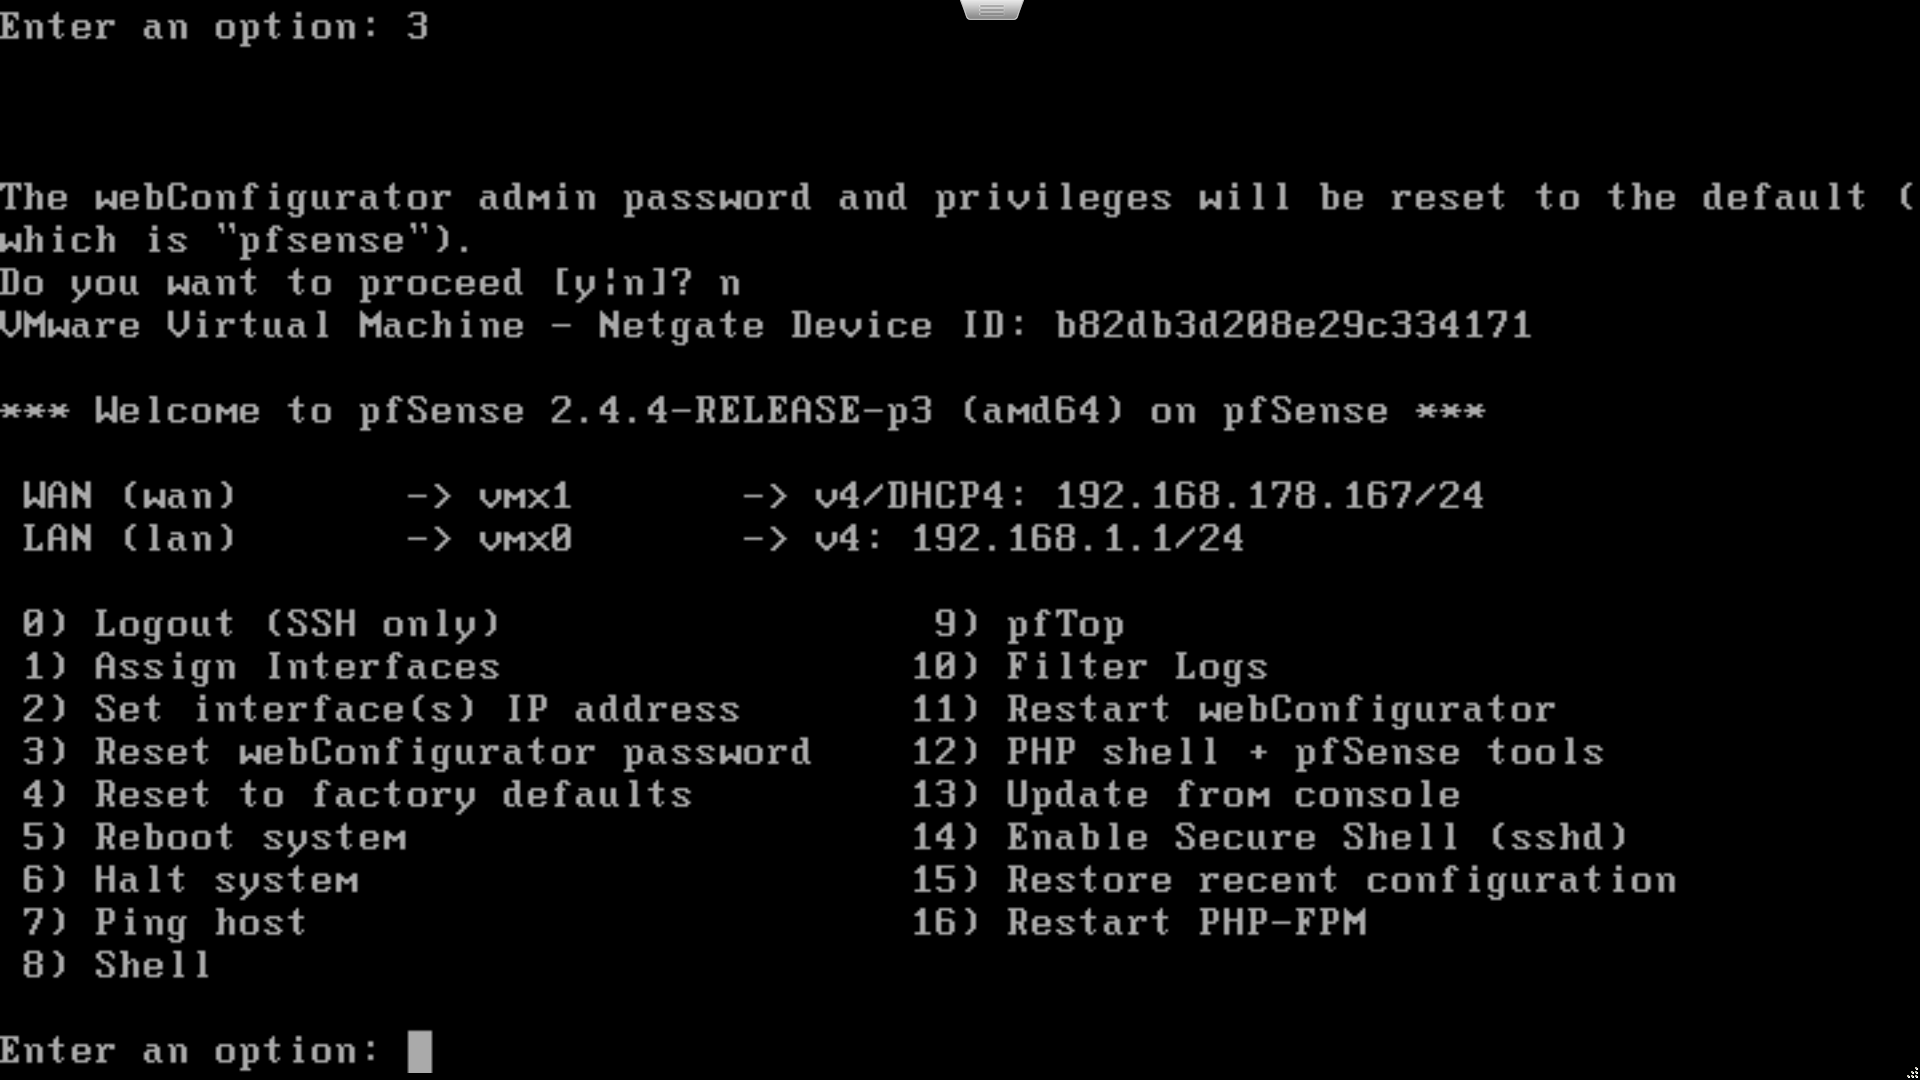
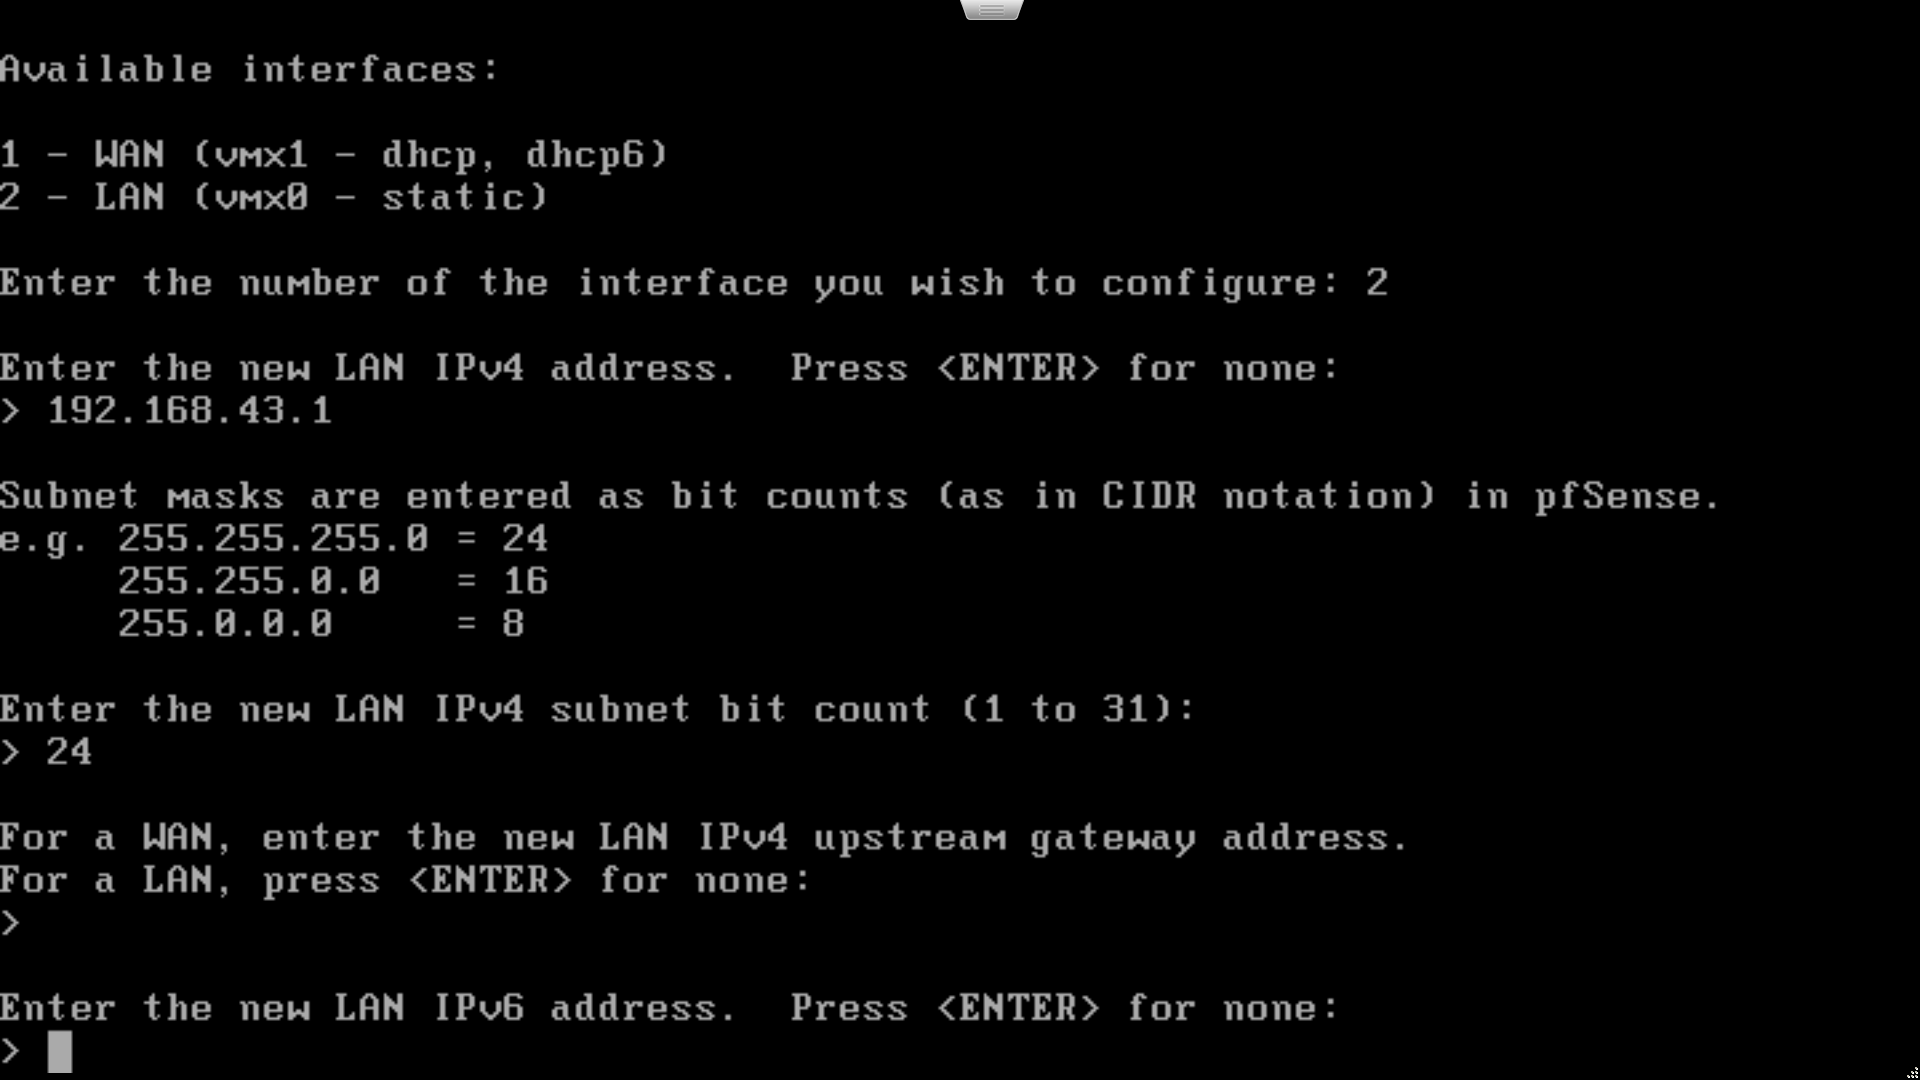
The LAN interface defaults to an IPv4 address of 192.168.1.1/24. If you need to change this to match your existing network, select option 2 (set interface IP address) from the menu, then option 2 again to edit the LAN interface. Enter the desired LAN IPv4 address and subnet mask for the device when prompted. Don’t enable IPv6 or DHCP right now; we’ll do that later from the web admin interface.
Step 3: Initial configuration wizard
Configure a computer with a static IPv4 address in the same range as the IPv4 address you assigned to the LAN interface on the firewall. You can connect this computer directly to the LAN port on the firewall (using a crossover cable if you’re working with older hardware that doesn’t support Auto-MDIX) or connect via a switch.
Using your web browser, go to the LAN IPv4 address that we configured in the previous step. Log in using the username “admin” and the default password “pfsense”. You will be presented with the initial setup wizard. Click on next, then next again at the following screen to begin the setup of your new firewall.
Enter the name you want to give your firewall, and the domain associated with your internal office network. We’re going to be boring and use “firewall” for the name, and “local” for the domain, but you should probably come up with something more distinctive.
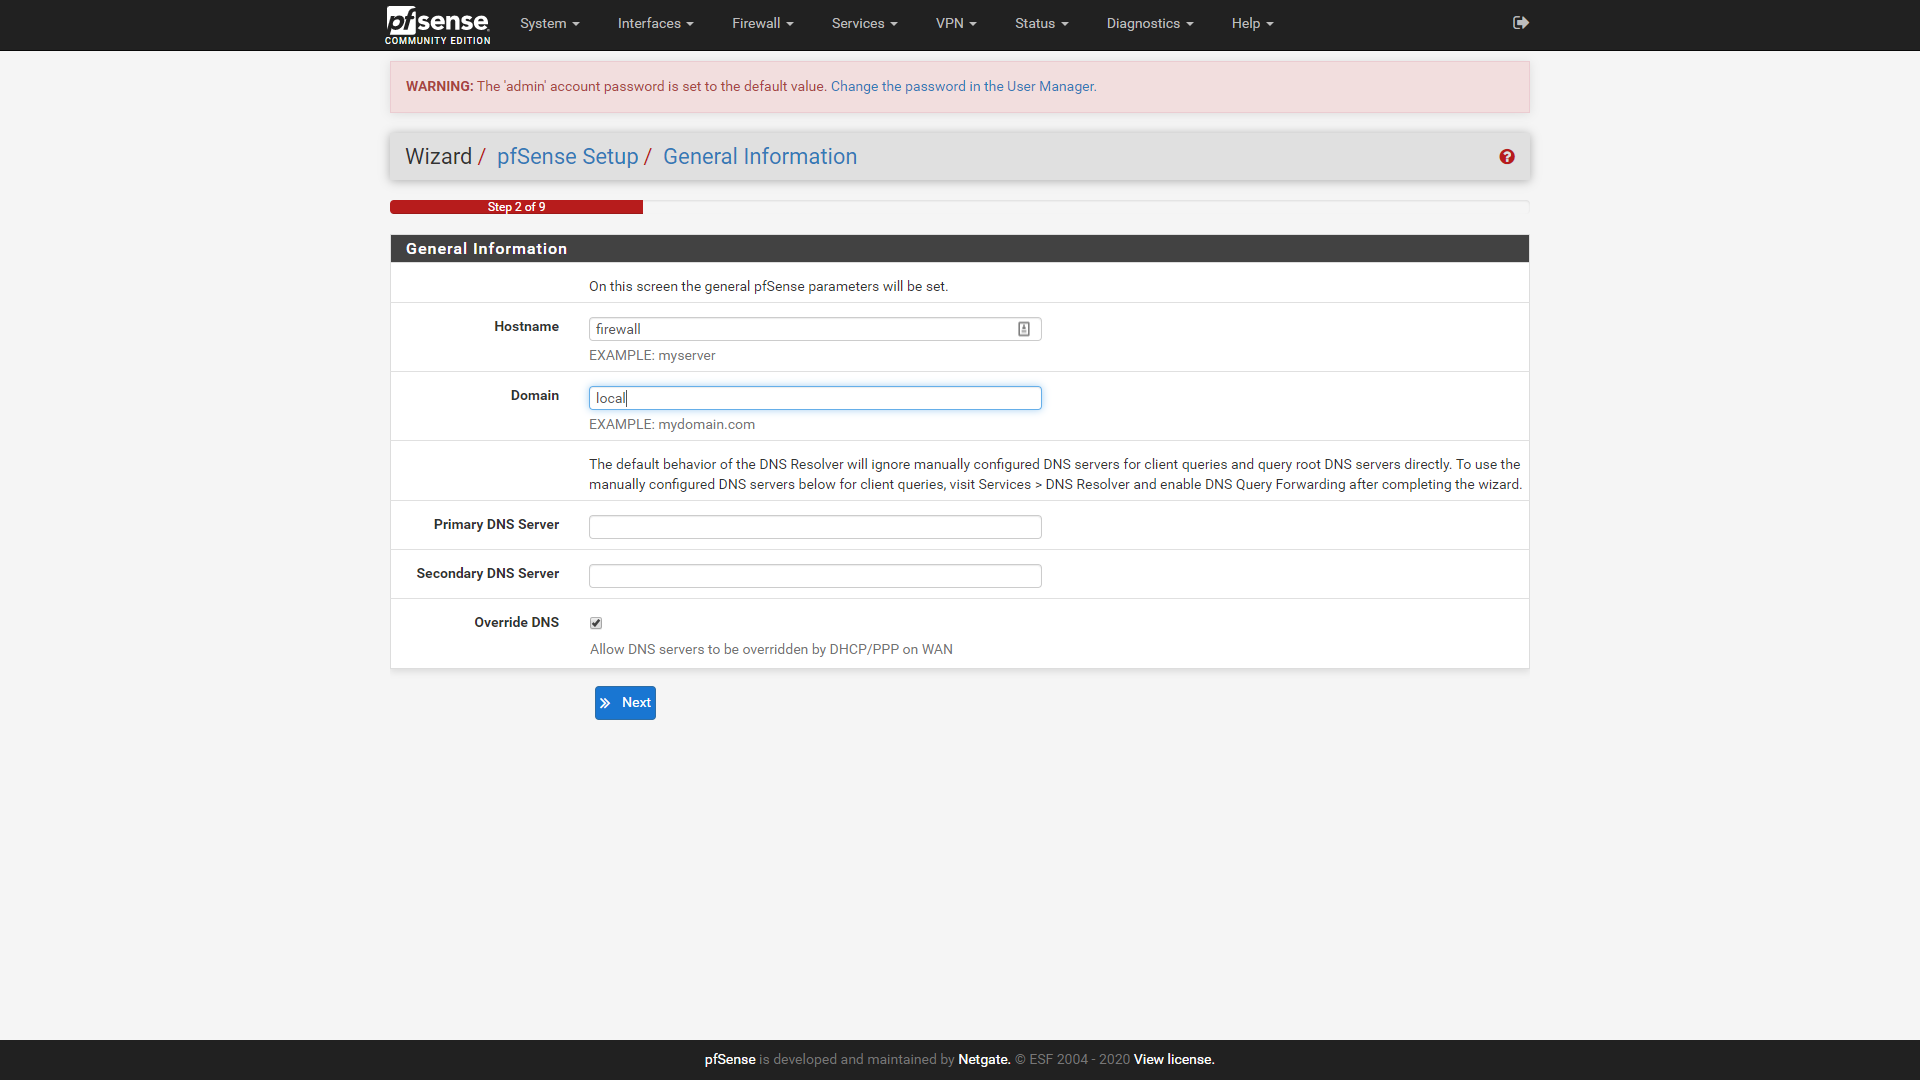
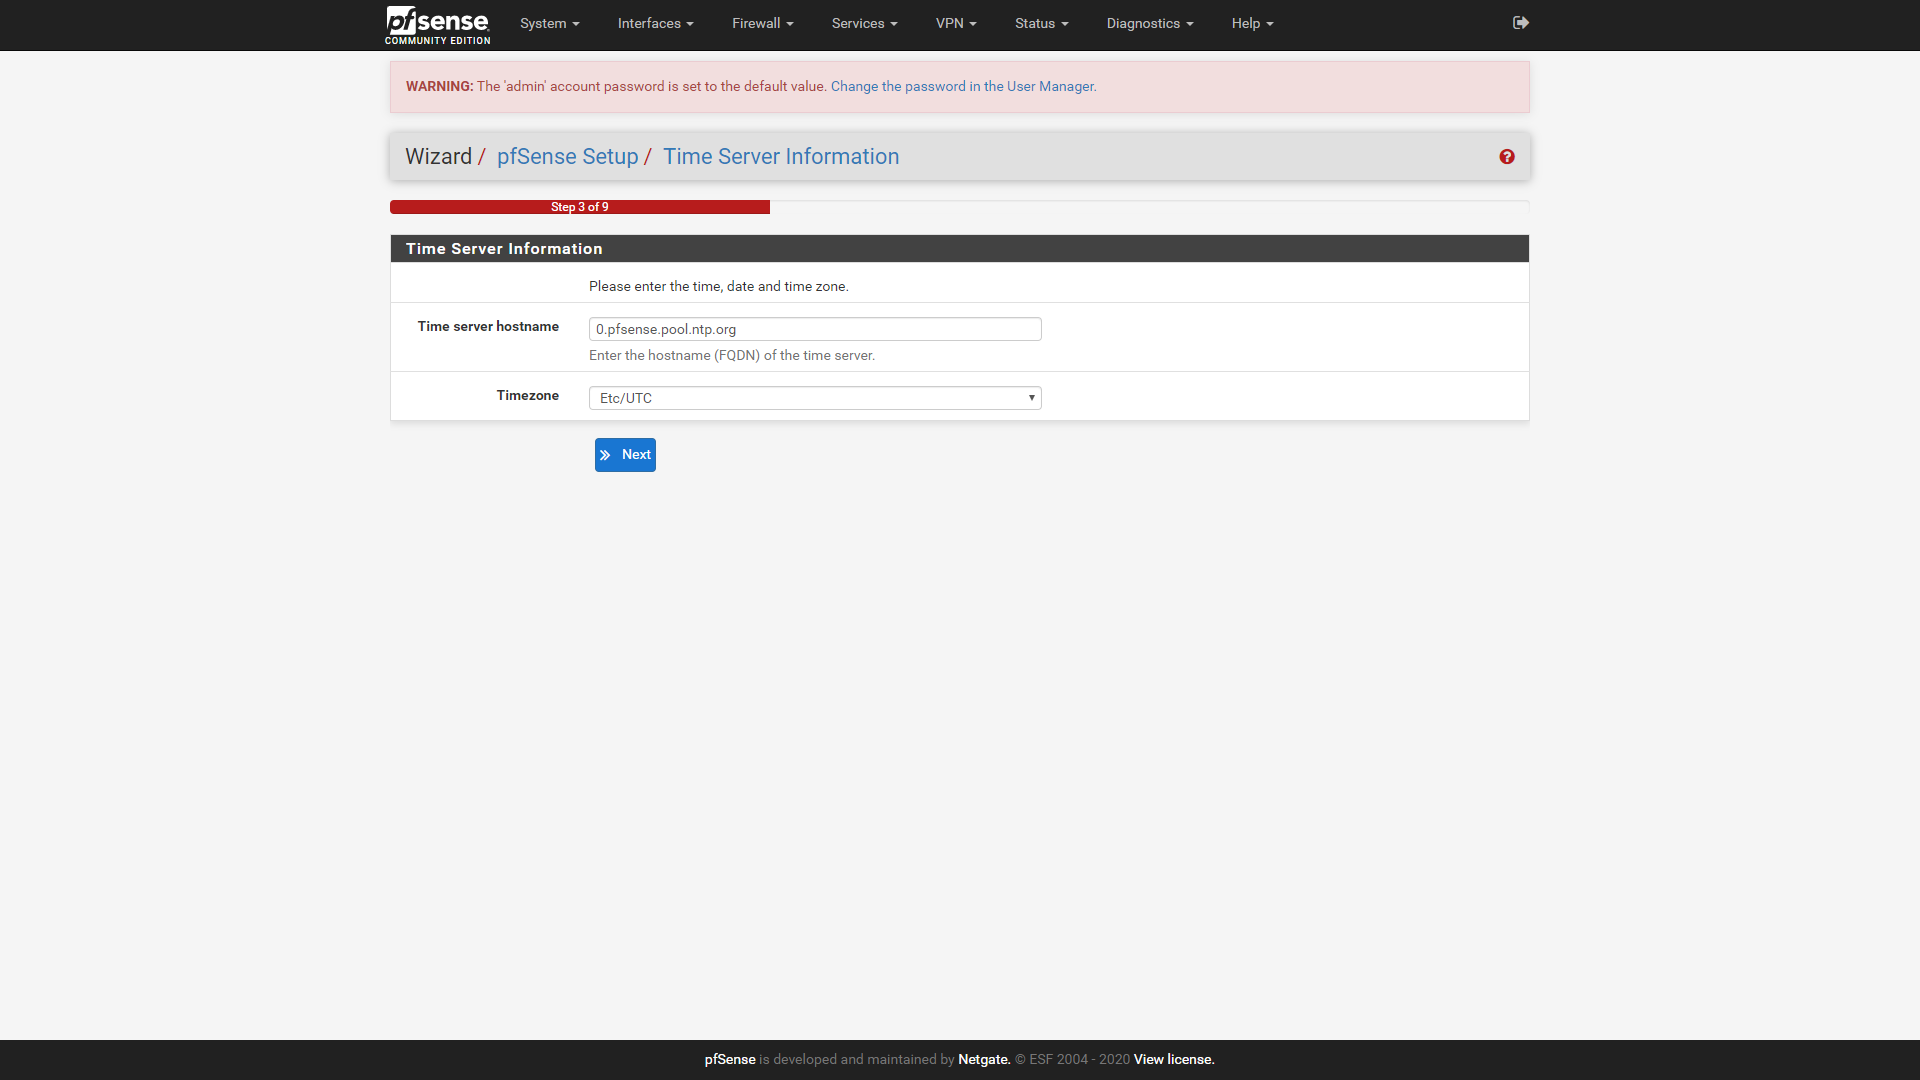
Click on next to move on to step 3 of the wizard. The time server can be left on the default, or set to a different one if you have a preferred NTP server for devices on your network. Set your time zone, and then click next to move on to step 4.
Now you need to set up your WAN interface. We’re using DHCP, so can leave everything on the defaults, but if you are connecting this device to an ADSL line via a DSL modem in bridge mode, you should select PPPoE here and enter the details provided by your ISP in the PPPoE section of this page. Once you’ve completed WAN configuration, scroll to the bottom of the page and click next to move on to step 5, where we can review the LAN IPv4 address we configured earlier, and change it if necessary. Click next to keep the address the same and move on to step 6.
Set a new admin password, not forgetting to make a note of it somewhere, and then click next to move on to step 7.
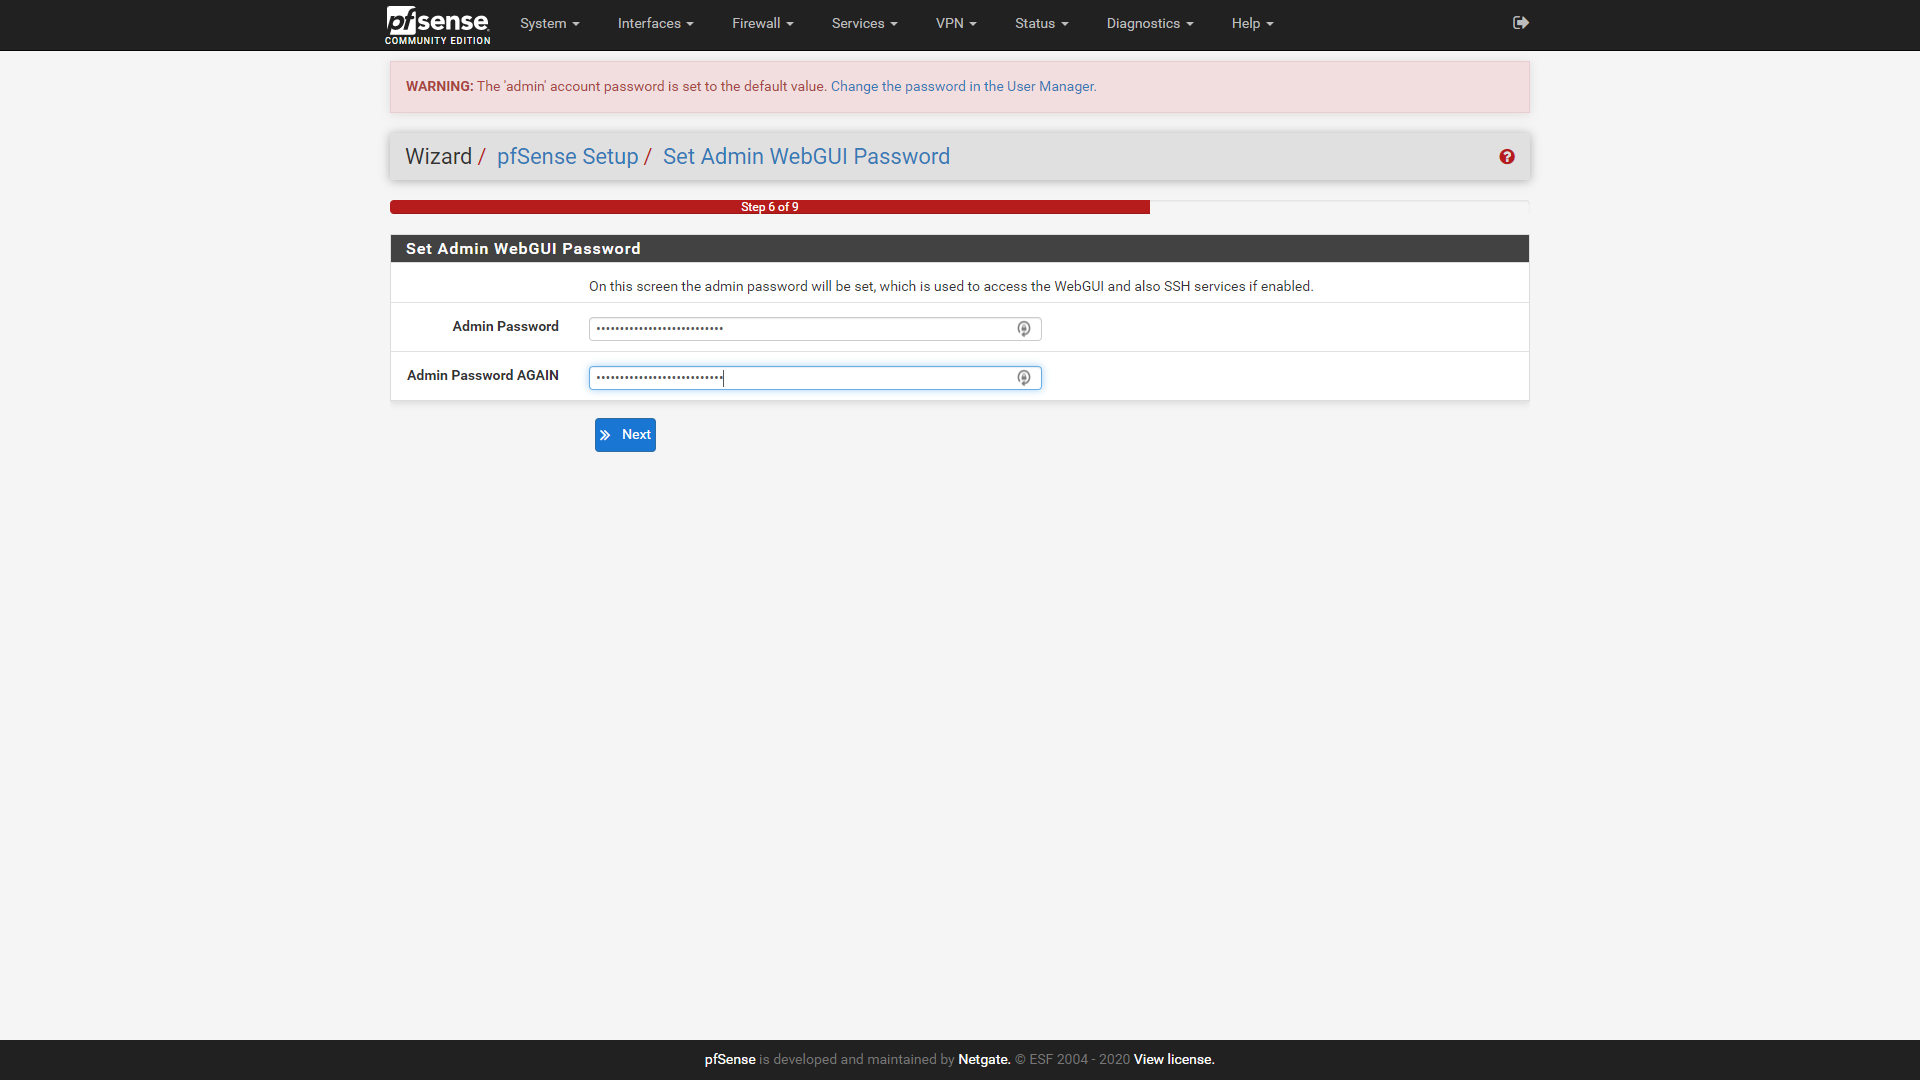
Click on reload to apply these changes to the device. If you changed the LAN IPv4 address in step 5, you will need to enter that address in your browser after this to access the device. Wait for the reload to complete, then click Finish on the last screen to exit the wizard and go to the device dashboard. Read and accept the license for the software again when prompted, then click close to clear the “Thank you” popup.
Step 4: IPv6
If your ISP offers IPv6 (as almost all do now) this is the time to set up the WAN interface IPv6 options to match those provided by your ISP. Select the Interfaces pull-down menu from the top menu bar, and select the WAN interface.
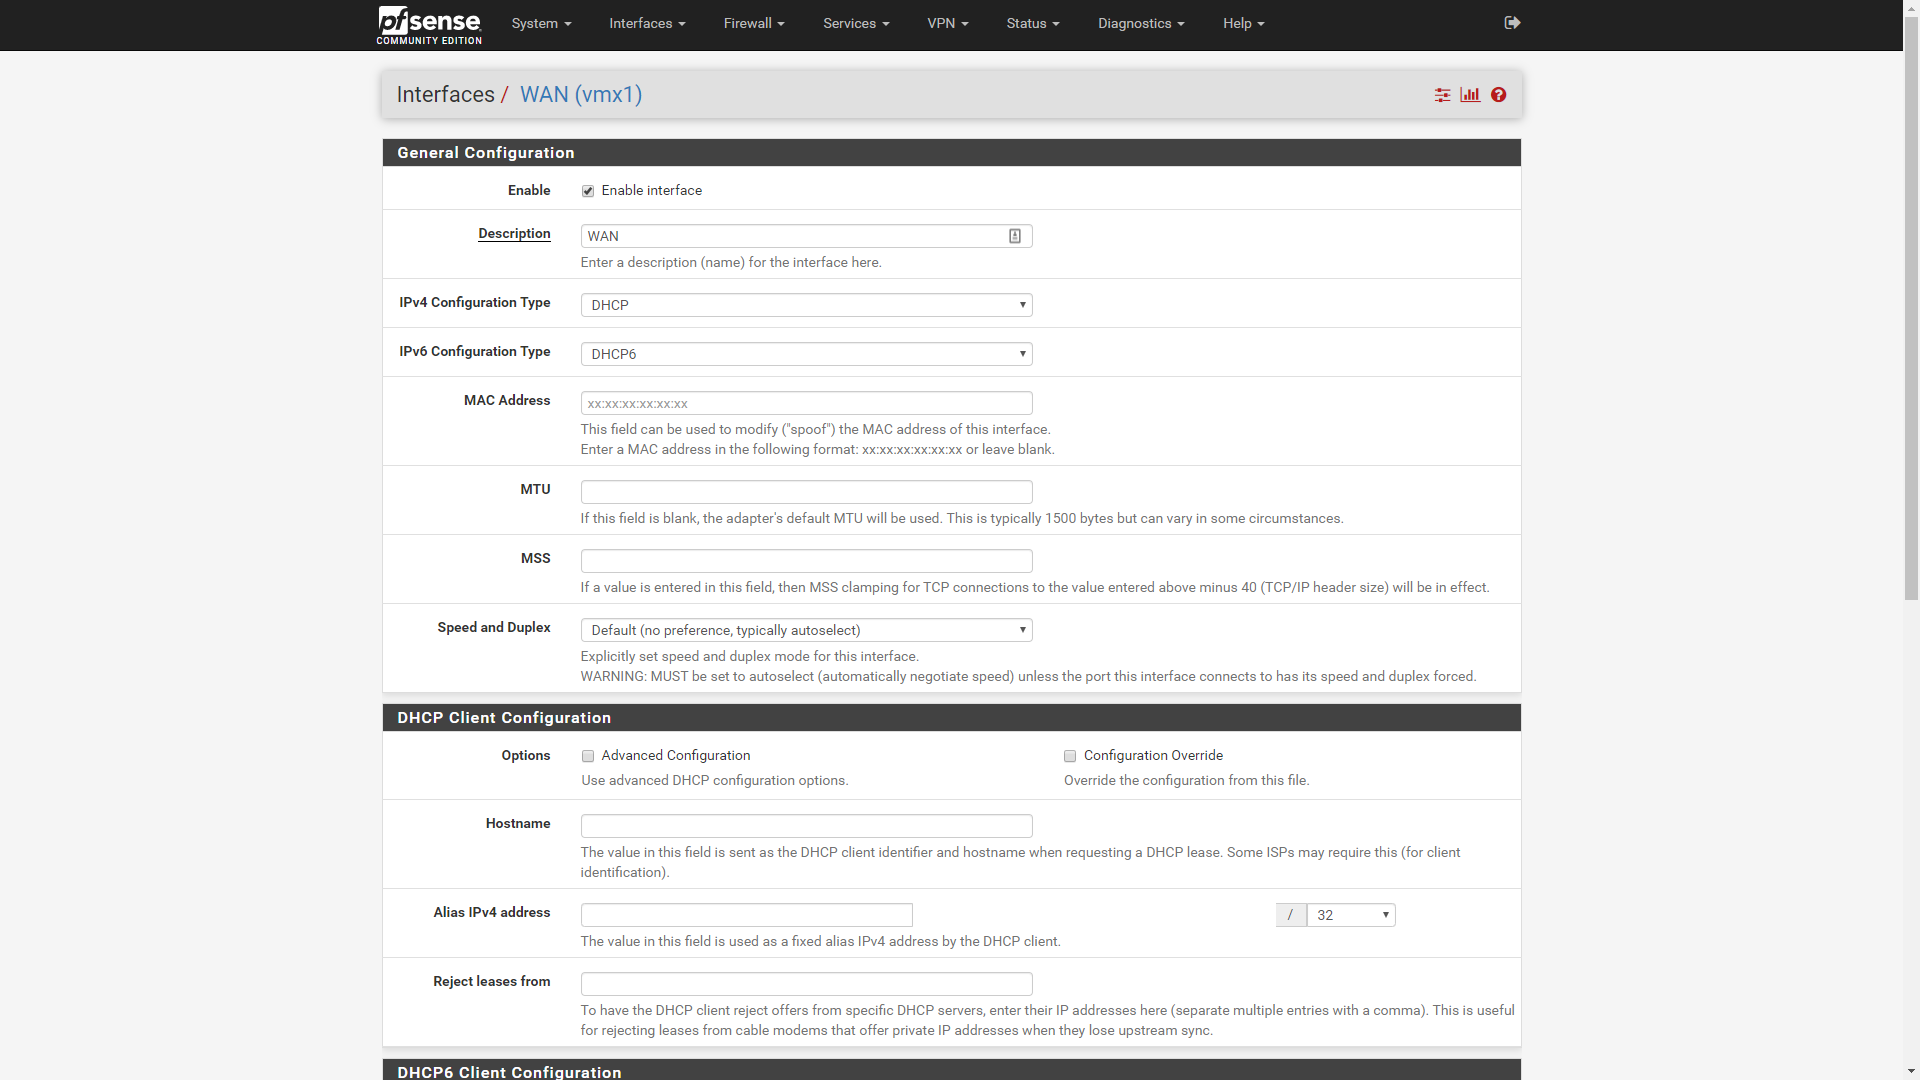
You will also need to set up IPv6 on your LAN interface. pfSense supports a range of different IPv6 configurations, from static IPv6 and DHCPv6 to stateless address autoconfiguration (SLAAC), 6to4 tunnelling and upstream interface tracking. Exactly which one you need will depend on the IPv6 provision from your ISP, who should provide you with adequate setup information to correctly configure your connection.
Step 5: Setting up local network services
From the menu bar across the top of the pfSense admin page, open the Services pull-down menu and select DHCP server. Tick the “Enable” box to turn on the DHCP server for your LAN interface, then enter the range of IPv4 addresses that will be allocated to devices on your LAN. We’ll set up a range of 200 addresses in this instance. Leave the DNS and WINS server options unset, as the firewall will use those allocated by the ISP on the WAN interface.

Scroll down to the bottom of the page and hit save. The DHCP service will start automatically. The setup wizard will have automatically created a single outbound NAT rule for you, so you should be able to access the internet from devices behind your new firewall.
Further configuration
If you require VPN links to your cloud provider, or to other offices, you can now set them up. We will not go into detail about that here as there are too many different types of VPN to cover, and the process is largely the same with any enterprise firewall device.
Additional services such as traffic prioritization, web filtering, load balancing multiple internet connections and so on are all available, either already built in or via add-on packages. These can be installed from the package manager, found on the System menu pull-down at the left of the top menu bar.
Take some time to explore the various menus and services to familiarize yourself with your new firewall and discover its many features.
K.G. is a journalist, technical writer, developer and software preservationist. Alongside the accumulated experience of over 20 years spent working with Linux and other free/libre/open source software, their areas of special interest include IT security, anti-malware and antivirus, VPNs, identity and password management, SaaS infrastructure and its alternatives.
You can get in touch with K.G. via email at reviews@kgorphanides.com.
