How to recover an Excel file
Learn how to recover Excel files on the cloud or on your desktop, whether you forgot to save or have overwritten your data

Forgetting to save your work in an Excel spreadsheet before closing can be an exasperating experience. Knowing how to recover an Excel file, therefore, is invaluable to avoid having to start again from scratch.
RELATED RESOURCE

Three key steps to modernising legacy applications in the cloud
The challenges and ways to achieve application modernisation success
Losing unsaved work is not always down to human error, computers are known to shut down with warning on occasion. Furthermore, with exceptionally large and complex spreadsheets. Excel may even crash.
Regardless of whether the lost file was a brand new document or a spreadsheet you have previously saved, recovering it should still be possible. This guide includes instructions on how to recover an Excel file on Windows 11.
Although, if you have permanently deleted the Excel file from your files and the Recycle Bin, unfortunately data recovery software may be the only way to retrieve it.
The good news is, you can take a look at the best data recovery software, to get an deep dive on the best tools to help recover your deleted data.
Step 1: Check your OneDrive version history

Your first port of call should be OneDrive, in case you were saving your Excel files to the cloud. Your files will be automatically saved at regular intervals, and OneDrive even stores the version history for you. This means if you accidentally overwrite or delete data on your spreadsheet, you can quickly restore a previous version of the file.
The first step is to head over to OneDrive on your desktop browser and locate the file where your file is saved. Right click on the file and click Version History. Look for a previous version of the spreadsheet that was saved before the overwrite and hit Restore. Another option is to download the previous version of the spreadsheet and save it as an entirely separate file.
Sign up today and you will receive a free copy of our Future Focus 2025 report - the leading guidance on AI, cybersecurity and other IT challenges as per 700+ senior executives
Step 2: Check the file history
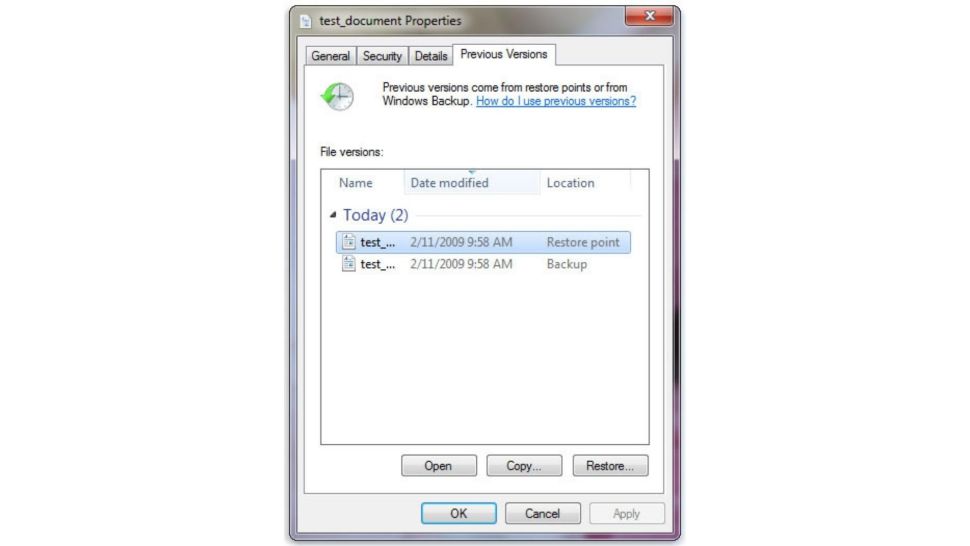
If you’re using a Windows device and have File History enabled in your settings, you can recover a lost Excel file directly through your desktop. This step is useful for when you have overwritten large amounts of data in your workbook and want to restore a previous version.
Open Windows Explorer and locate the file you want to restore. Right-click on the file and click the Restore Previous Versions option.
A new window will pop up with a list of all the stored previous versions of your file. Click the most recent version before the accidental overwrite and hit Restore. The file will automatically update to the previous version that you selected.
Step 3: Open Excel on your device
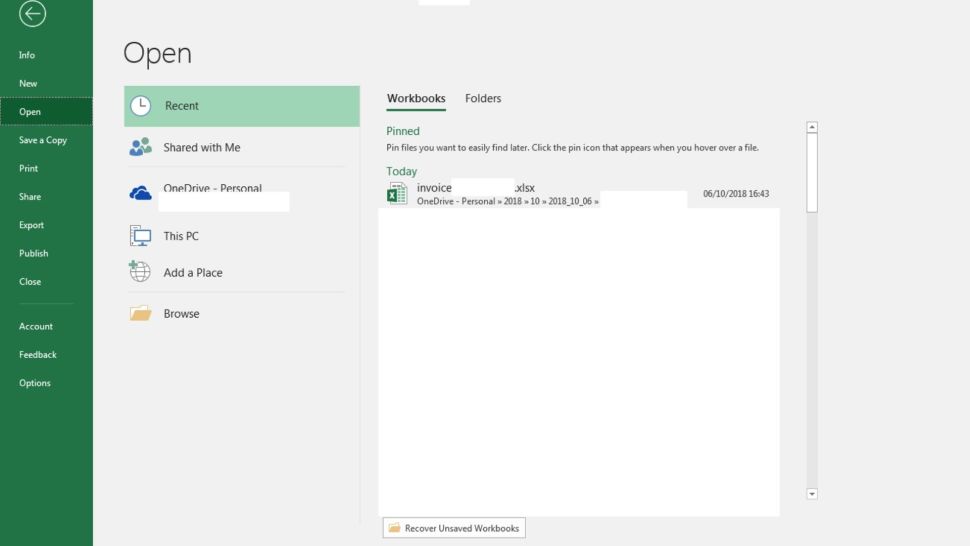
You can also recover lost workbooks and spreadsheets directly through the Excel program on your desktop. First, open Excel on your device and open up any existing workbook file.
In the panel on the left-hand side of Excel, click File and then Open. Under the Recent option, you’ll see a list of all the workbooks you recently worked on in the panel on the right-hand side—including any you forgot to save.
Scroll through the recent files until you locate the unsaved workbook you need to recover. The timestamp to the right of the document titles in the list will help you identify when the file was created or last worked on.
Once you locate your lost workbook, simply double-click to open it up—and make sure to save it first thing.
Step 4: Click on Recover Unsaved Workbooks
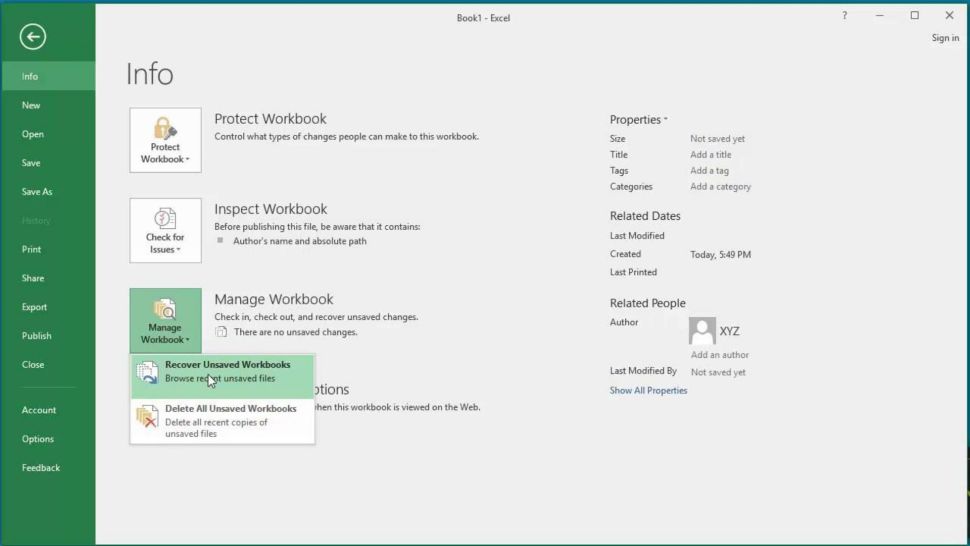
If you can’t see your workbook in the list of recent files in Excel, there is another option. When Excel is open, on the left-hand side, click File and then Info. Click the Manage Workbook icon, then click Recover Unsaved Workbooks.
This will pull up a file explorer with a list of files that you created but didn’t save. Once you locate your lost workbook in this window, simply double-click to reopen the file and begin working on it again.
Step 5: Save your recovered file
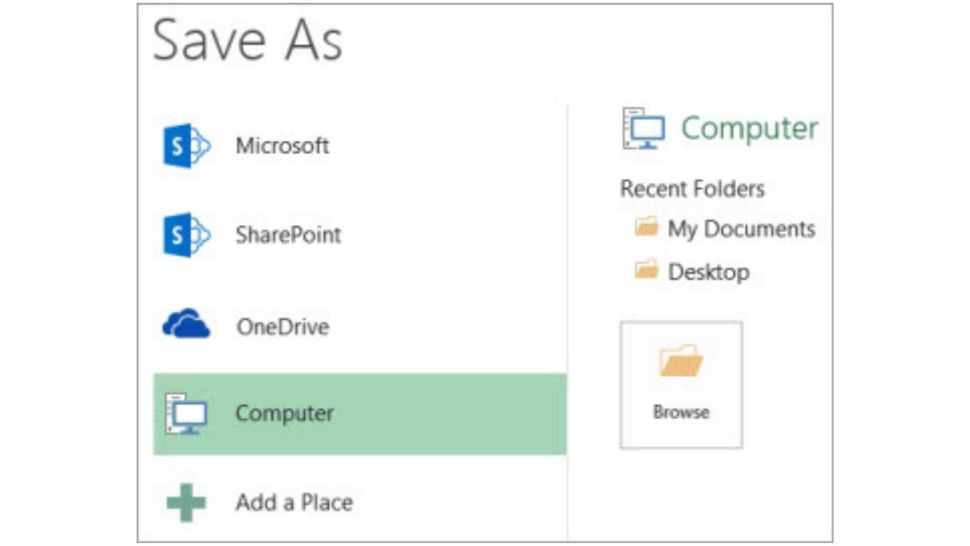
Once you have recovered your lost Excel file, it’s a good idea to immediately save the file to your desktop or to OneDrive to avoid this scenario happening again.
To save the file to your desktop, click File at the top of your Excel toolbar, then click and Save As before selecting This PC. When the file explorer opens up, use the left panel to select the location or folder where your file should be stored. Name your document in the File Name field before hitting Save.
Alternatively, you can save the file to OneDrive by selecting OneDrive instead of This PC. This will open up a window where you can enter your OneDrive login credentials before redirecting you back to Excel to choose a folder, name your document, and save it to OneDrive.
Summary
It can be a stressful moment when you realise that you’ve lost an important Excel file or a spreadsheet that you’ve spent a lot of time on. If you’re working between multiple workbooks, it’s also an easy mistake to overwrite lots of critical data in a spreadsheet.
Luckily, Microsoft has made it fairly straightforward to recover an Excel file, whether it has never been saved at all or you just need to find a previous version of a saved spreadsheet.
Lauren holds a degree in marketing from Griffith College, Dublin, and brings more than five years’ experience as a marketing services advisor and marketing executive to her writing. An expert in SEO, copywriting, email marketing, analytics and more, Lauren has worked for the likes of the Bank of Ireland, Irish Stock Exchange, and the Yellow Pages.
