How to migrate Windows 11 to an SSD
Moving Windows 11 to an SSD is an incredibly effective way of breathing new life into a struggling device

Migrating Windows 11 to an SSD is one of the best ways to breathe new life into your system. Whether your PC has started to slow down, or you find that it takes an age to boot to your desktop, an SSD is likely the answer.
Knowing how to migrate Windows 11 to an SSD is a handy skill for any Windows users to know, and it can be achieved using just a handful of relatively straight forward steps.
Although SSDs can be an expensive investment, they typically offer much better performance than a conventional hard disk and will enable Windows 11 to load far quicker when you first boot your PC.
Swapping out a hard disk for an SSD is a relatively straightforward upgrade. However, you’ll first need to transfer all the data from your current hard disk to the SSD. We’re going to talk you through that process.
How to migrate Windows 11 to an SSD
In order to successfully migrate Windows 11 to an SSD, there are a number of steps to follow, involving multiple Windows tools. We will be going over the following:
- Backing up your existing drive
- Adding a new SSD
- Cloning data from an old drive to the new drive
Step 1: Back up your data before moving to a new SSD
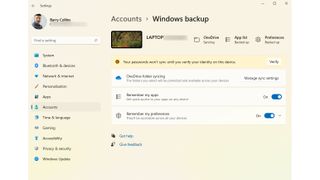
Before moving any data, we advise you perform a backup. Migrating Windows 11 to an SSD involves cloning and moving data to a brand new drive, and things don't always go to plan – so it's best to be prepared.
Fortunately, Windows 11 has a variety of built-in backup options, including backing up files to Microsoft’s cloud storage service OneDrive or using the File History tool with an external hard disk/SSD.
Step 2: Plug in your new SSD
Once the backup is sorted, it’s time to plug in the SSD – either via the USB caddy or by putting it straight in a desktop PC. If you’re adding an SSD to a desktop PC, simply power down the machine and attach the new drive to a spare bay. You may find that your case only has hard drive bays, in which case you’ll need to buy an SSD caddy or adapter. Once secured, connect the SSD to the motherboard and power supply using SATA cables.
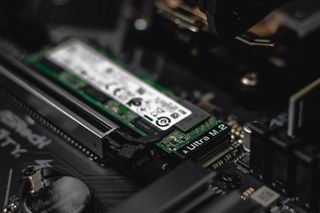
If using an M.2 SSD, simply place the drive into the spare slot on the motherboard and screw in the other end using an M.2 screw.
Step 3: Activate your new SSD
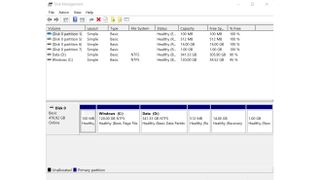
File Explorer will usually not show new hard drives or SSDs in Windows unless the hardware has been partitioned or initialised. To accomplish this, follow these steps:
- Select the Windows search bar and look for ‘partition’
- Choose ‘Create and format hard disk partitions’
- Once selected, it should display the option to initialize the disk by utilizing MBR or GPT

Hold cyber security at the core of your organization
DOWNLOAD NOW
Windows 11 only boots from drives formatted with GPT, so it’s useful to choose this option. After you’ve done this and the process is finished, you should find in the Disk Management window that the drive will be displayed as unallocated space.
Step 4: Clone the hard disk
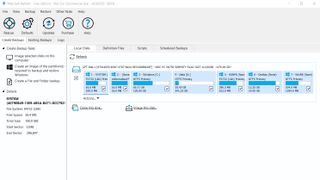
You will now begin the process of transferring data to the new SSD. The SSD you purchased could come with software that will clone your hard disk, or you can always search for software that performs this function.
For this guide, we will be using the free version of Macrium Reflect, which is a reliable cloning tool that you can access by providing an email address.
After installing Macrium, choose the hard disk you’re using and select the ‘Clone This Disk’ button which should be shown below it. A new window should appear, with the installation wizard, that will guide you through the process.
Ensure you’ve selected all of your hard disk’s partitions, and then make the destination drive your new SSD. Click OK to begin the process, ignoring any messages which ask you to save a backup schedule.
It might take some time for this to be completed, which will differ depending on how much data your device has that needs to be copied.
Step 5: Replace the hard disk (laptops / all-in-ones only)
If you’re changing your old hard disk for the new SSD in an all-in-one or a laptop, then this will be the moment where you have to swap the drives. It is extremely important to ensure you’re careful when carrying out this process. This means writing down where the screws that you take out came from as well as deploying an anti-static band or ground yourself somehow before handling any sensitive components.
After you’ve managed to remove the old drive, grab your SSD and gently slide it into the slot and, after making sure which holes they go into, replace the screws.
Step 6: Reboot from the new drive
Now you can hit the power button and you might be lucky and find that the system is automatically using the new drive to boot from once you’ve inserted the new SSD and replaced your old hard disk. If this doesn't happen, you will need to configure your system to boot from the new drive where the Windows installation now sits. To do this:
- Boot / restart your system and open BIOS using the appropriate keyboard shortcut (this could be F8, F12 or delete, depending on the motherboard manufacturer)
- Find the Boot settings menu – this is usually found in the main Settings menu
- Set Boot Option 1 to your new drive
- Exit and your system will reboot
If successful, your system should boot to your desktop. You will find that booting will generally be far quicker now you are using an SSD, going from startup to desktop in a matter of seconds. You can also test out applications, which should also load up far faster than you're used to.
Get the ITPro. daily newsletter
Receive our latest news, industry updates, featured resources and more. Sign up today to receive our FREE report on AI cyber crime & security - newly updated for 2024.
Barry Collins is an experienced IT journalist who specialises in Windows, Mac, broadband and more. He's a former editor of PC Pro magazine, and has contributed to many national newspapers, magazines and websites in a career that has spanned over 20 years. You may have seen Barry as a tech pundit on television and radio, including BBC Newsnight, the Chris Evans Show and ITN News at Ten.
